 Welcome to my first Painting Scenery Tutorial, this tutorial will focus on painting walls or brickwork in a fairly natural grey stone effect. Ideal for painting drystone walls or similar pieces of scenery.
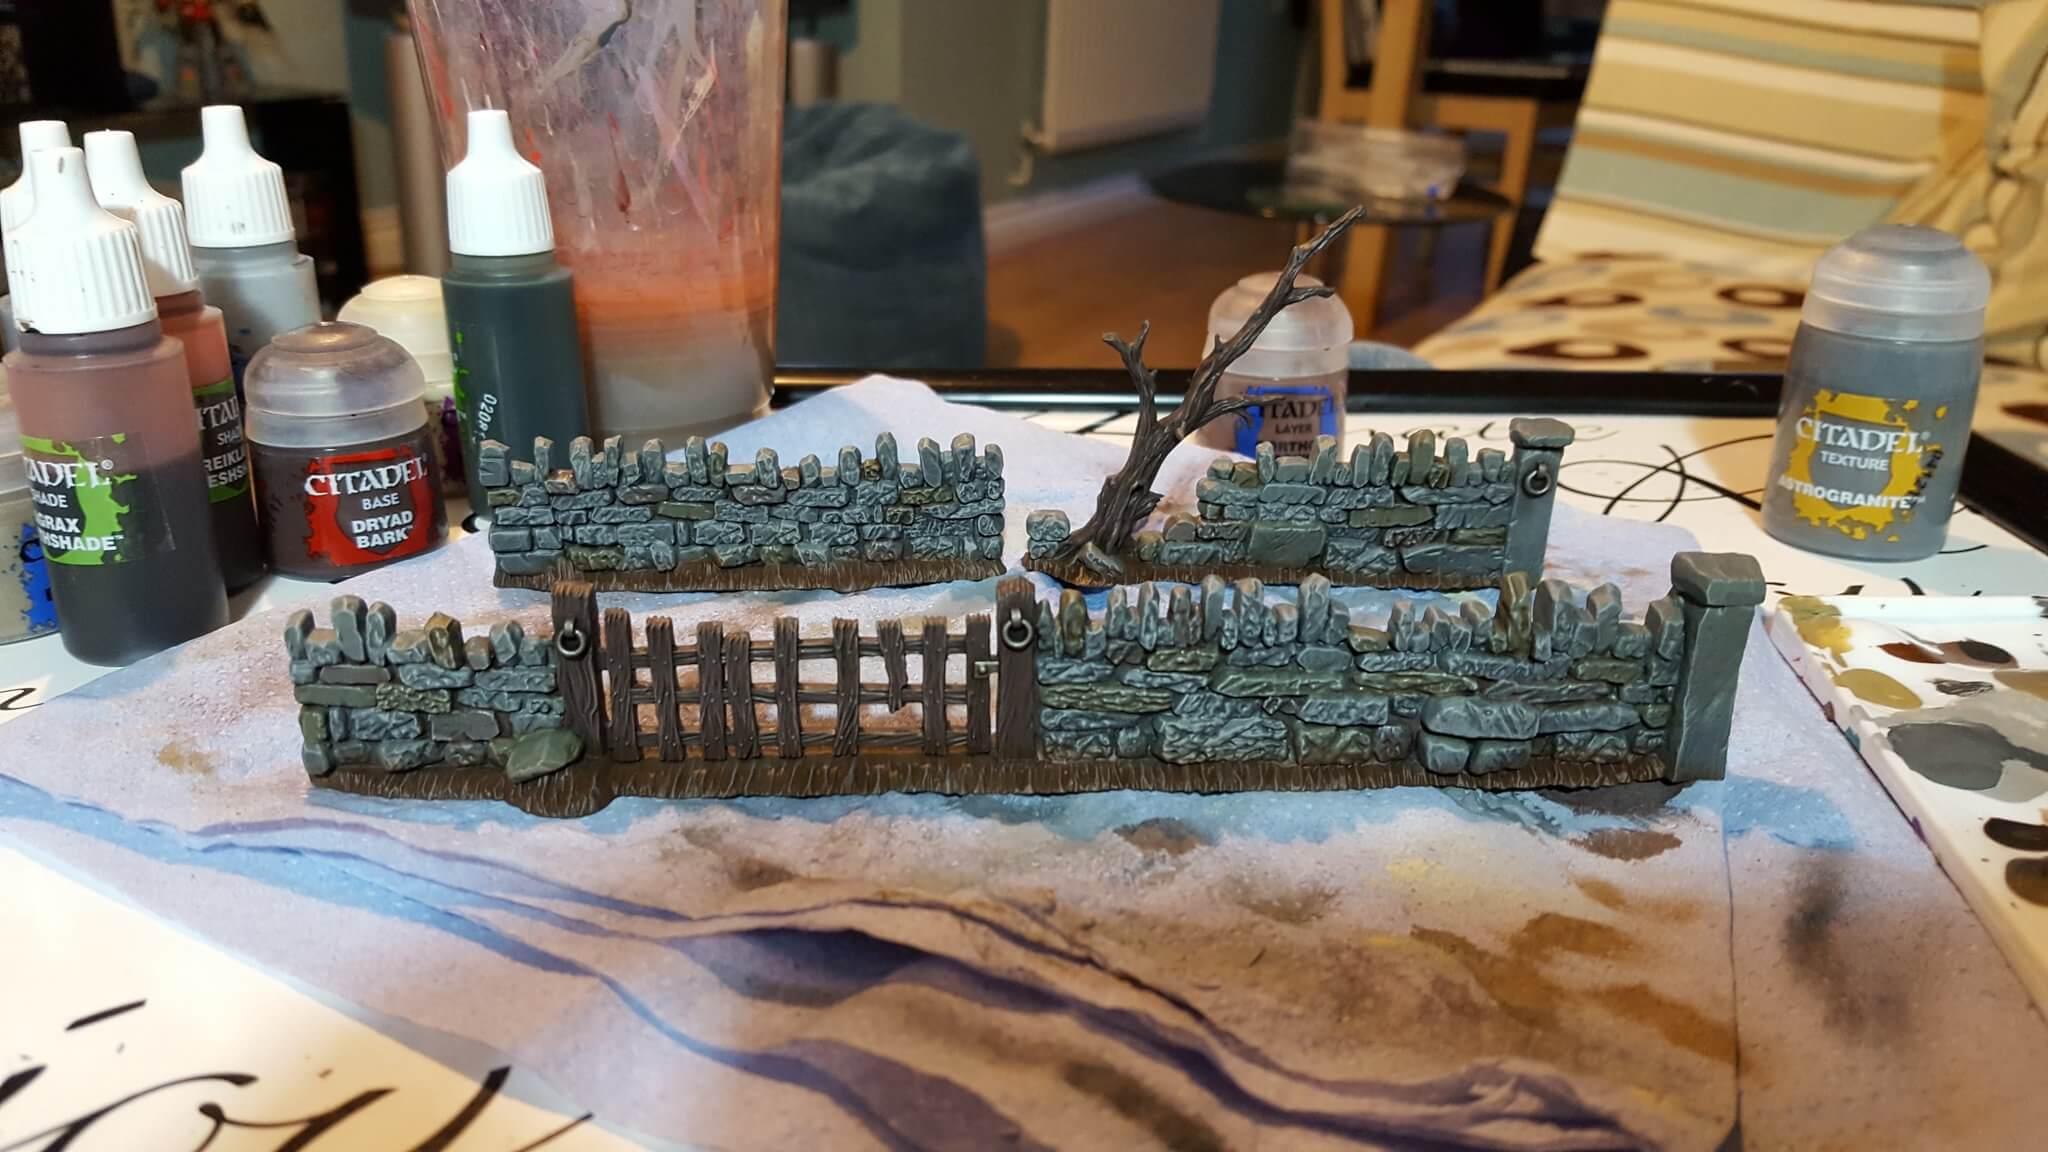
I hadn’t actually thought of writing a tutorial for this so unfortunately I’ve only got a picture of the finished wall pieces. However the steps are pretty straightforward so hopefully you can follow them through.
Painting Scenery – Drystone Walls
1. Undercoat

As with miniatures the first step with painting scenery is the undercoat. One of the nice things is that you can use a combination of spray can’s to achieve the effects you’re looking for. For this tutorial you’ll need two Citadel Spray Can colours – Chaos Black and Skavenblight Dinge. Firstly undercoat the entire wall using Chaos black, making sure that you get the entire model covered, including the gaps between the stones. Rather than one super thick layer, you’re best off to apply a few lighter coats.
Next up spray your wall with Skavenblight Dinge, but only from the top and a 45 degree angle from the top, this is what we’d term a “Zenithal Highlight”. What you’re looking for is the black to still be visible if you look at it from the bottom, and visible in the gaps between the stones, the effect will appear quite subtle until you compare it to one that’s still black.
2. Drybrushing


Probably the most common techniques used when painting scenery of any kind, drybrushing is the best way of picking out all of the details and rough areas on a piece of scenery.
For this tutorial, using a large drybrush, give the wall seconds a good drybrush of firstly Dawnstone and then Administratum Grey. Dawnstone is available in a Dry paint too. Try to drybrush in all directions rather than just up and down, you want to catch all of the edges of the stones.
3. Wood and Metals


Depending upon the miniatures you’re painting, you may well have wooden and metal items on your scenery piece. To paint these, give the wooden areas a coat of Dryad Bark (which personally is one of nicest paints to use) and the metal areas a coat of Leadbelcher. Both of these paints have a really good coverage so you’ll go over the greys without too much hassle – but still apply two thinned coats so you keep the detail of the model.
4. Washes
Now we can get onto one of the more creative parts of painting scenery, using Reikland Fleshshade, Seraphim Sepia and Anthonian Greenshade, pick out individual bricks and stones in a random pattern. Reikland Fleshshade will look a bit weird, but bear with it. Make sure that you wash both sides of the same brick too 😉
I used Anthonian Greenshade sparingly as it’s quite strong and contrast a lot, I also focused towards the bottom of the wall to represent stones going a little mossy and green.
Agrax Earthshade needs to be applied to the wooden and metal areas, this should shade them and in the case of the metal, finish them off. One thing I also did was to apply some Anthonian Greenshade to the bottom of the wooden fence posts and tree to give it a green hint.
5. Drybrush
And the last but one step in this painting scenery tutorial. Using either Screaming Skull or Tyrant Skull (they’re the same colour, but Tyrant Skull is a dry paint), carefully drybrush the wall sections, avoiding the fence and wooden areas as best you can. You only need a fairly light coverage to bring all of the stones together.
Then using Gorthor Brown drybrush any wooden areas, avoiding the wall sections.
6. The Base
The wall sections from the Fortified Manor have a small base section which I simply airbrushed Vallejo Burnt Umber and drybrushed with Screaming Skull. Though basic, this matches my Realm of Battle Boards, but you’ll want to paint this to match whatever boards you normally play on. I wouldn’t be beyond applying texture paint to match your army either if you don’t have a permanent board to use.
Going Further
Ultimately it’s entirely up to your how detailed you want to go when painting scenery to play on. For me, the key item is that it should be a lot less detailed than the armies that will fight on or around it else you risk your scenery piece detracting from your models (which is a bit daft). If you did want to take the walls a little further, what I’d likely do is to water down some Skrag Brown and apply it to the metal areas to represent rust, and mix up a few green and yellow colours and apply them in patches on the stones to represent lichen and moss. You could also add some highlights to the wooden area by hand to just define those items. Again, it’s a personal choice and will depend upon lots of factors.
So, I hope you’ve enjoyed my first painting scenery tutorial, please give me some feedback if there’s anything you feel I could improve or doesn’t make sense and please check out my next one where I’ll give a step by step on how I’ve painted up a Watchtower.
Hi!
You are indeed correct, I did say that I’d write a tutorial however, that appears to never have happened! I can however confirm that I have just managed to dig out all of the photos I’ve taken on how I painted the walls – no paints in the photos so I’ll have to dig through my painting book. Watch this space, I’ll try and create something in the next few weeks as time permits
Bonjour
enfin un tutoriel complet merci a toi j ai aussi une tour de guet a peindre tu en parle a la fin de ton tuto sur les pierres mais je ne le trouve pas ou tu la caché ? 🙂
merci a toi