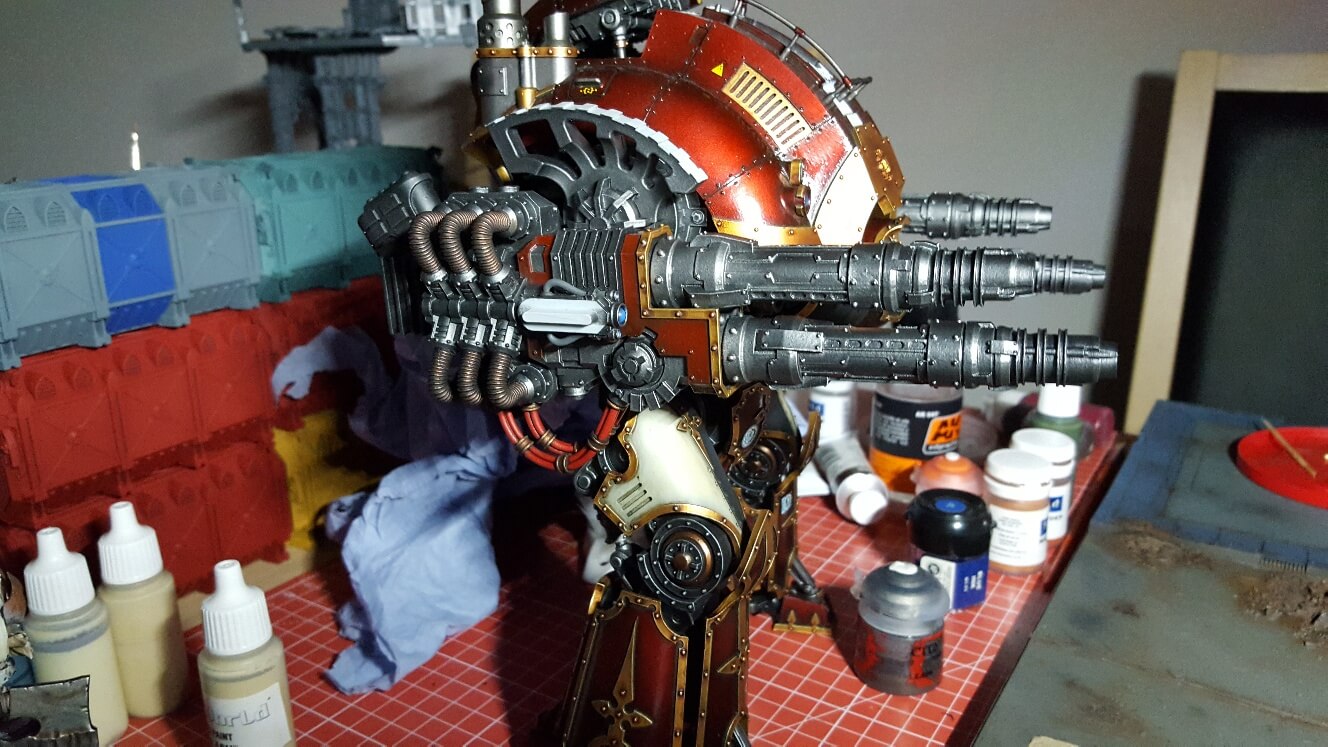
The third progress post for Armies on Parade 2017 sees some long overdue work on the guns for my Acastus Knight Porphyrion.
Oddly large weapons are one part of models that I struggled with for inspiration. The engineer part of me wants to make sure that the weapon looks technically feasible, but this tends to result in a fairly plain and boring paint job, going “sci-fi” looks better but I don’t actually like the result. For the Knight Porphyrion I was slightly under pressure due to time limits for Armies on Parade, so I stuck with a more basic style with the intention that I can go back at a later date.
Assembling the Knight Porphyrion Arms
I underestimated how big the Porphyrion Arms are and I mean massively underestimated. When assembled, each gun is longer than a regular Imperial Knight stands tall and took ages to get the barrels correctly positioned. I also make life more complicated by magnetising the “shoulder” joint, meant I could only pin the lower of the two barrels. Overall I’m fairly happy – if you look carefully I don’t think the barrels quite line up as well as they could, but you’d struggle to spot it unless you really peer. One of the barrels also wasn’t quite as well cast as it should have been (I got one replaced) but it was far too late to do anything and it’s not immediately obvious.
Painting the gun
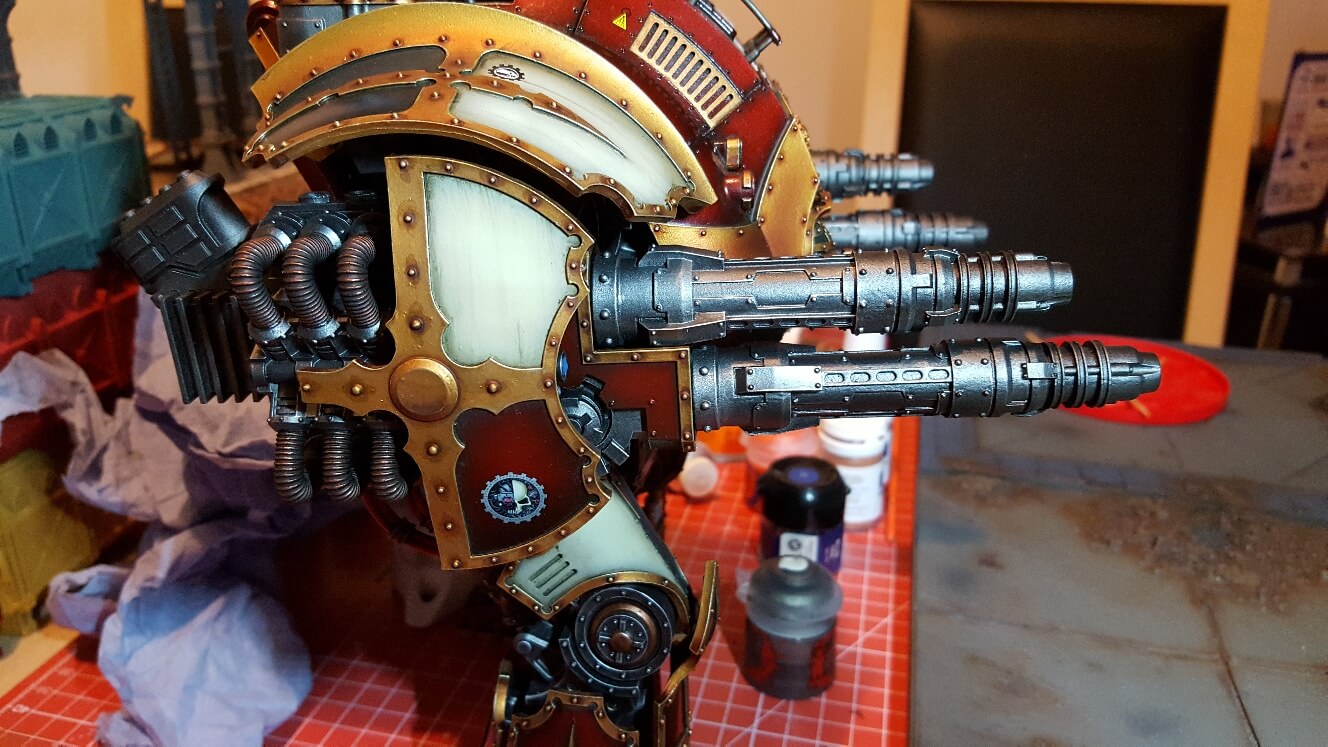
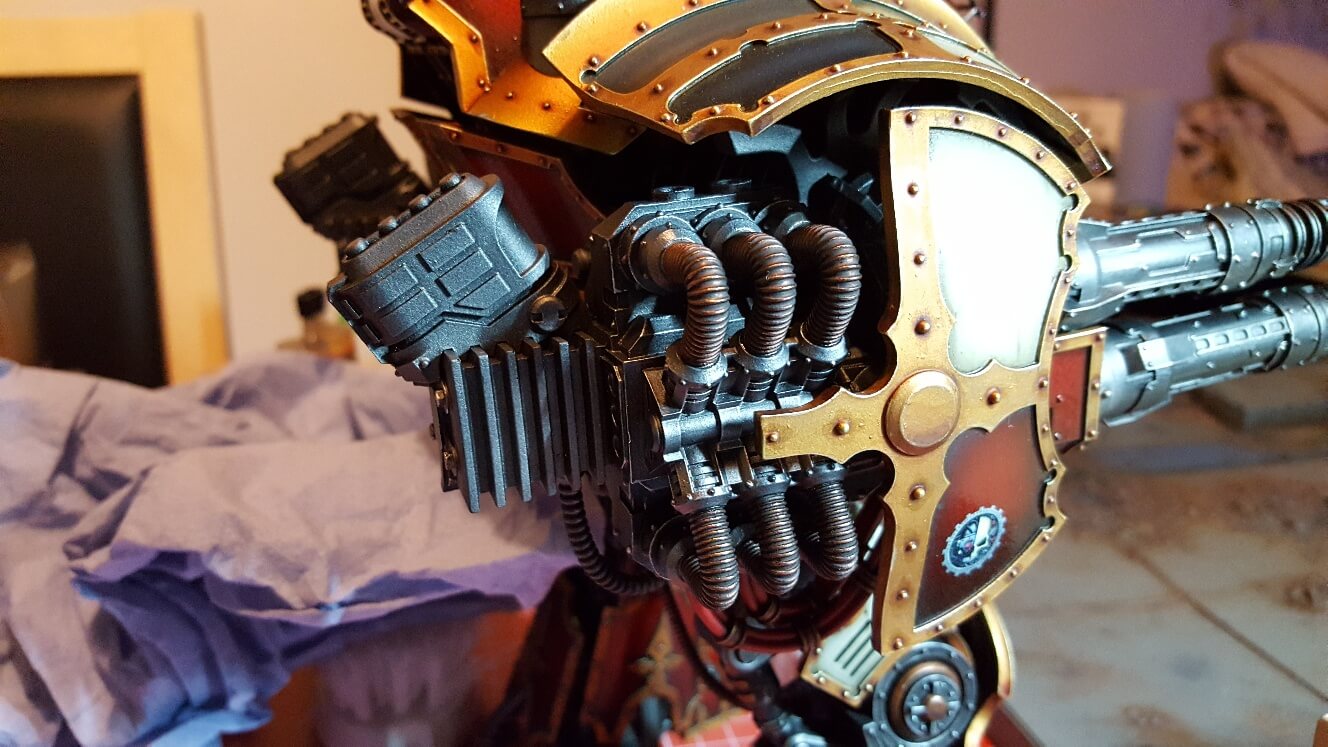
Once assembled they got a coat of Vallejo Metal Colour Gunmetal followed by a drybrush of Rub and Buff silver. This might seem completely random (and you’d be right), but the result is a fairly decent metal effect. By not using a wash, you keep the sheen of the airbrush paint and the rub and buff provides a phenomenally smooth and soft highlight. If I have time I’ll pop an edge highlight on there, but that’s not urgent. The back heatsink got a coat of Vallejo Metal Colour Burnt Iron which just adds a nice variety.
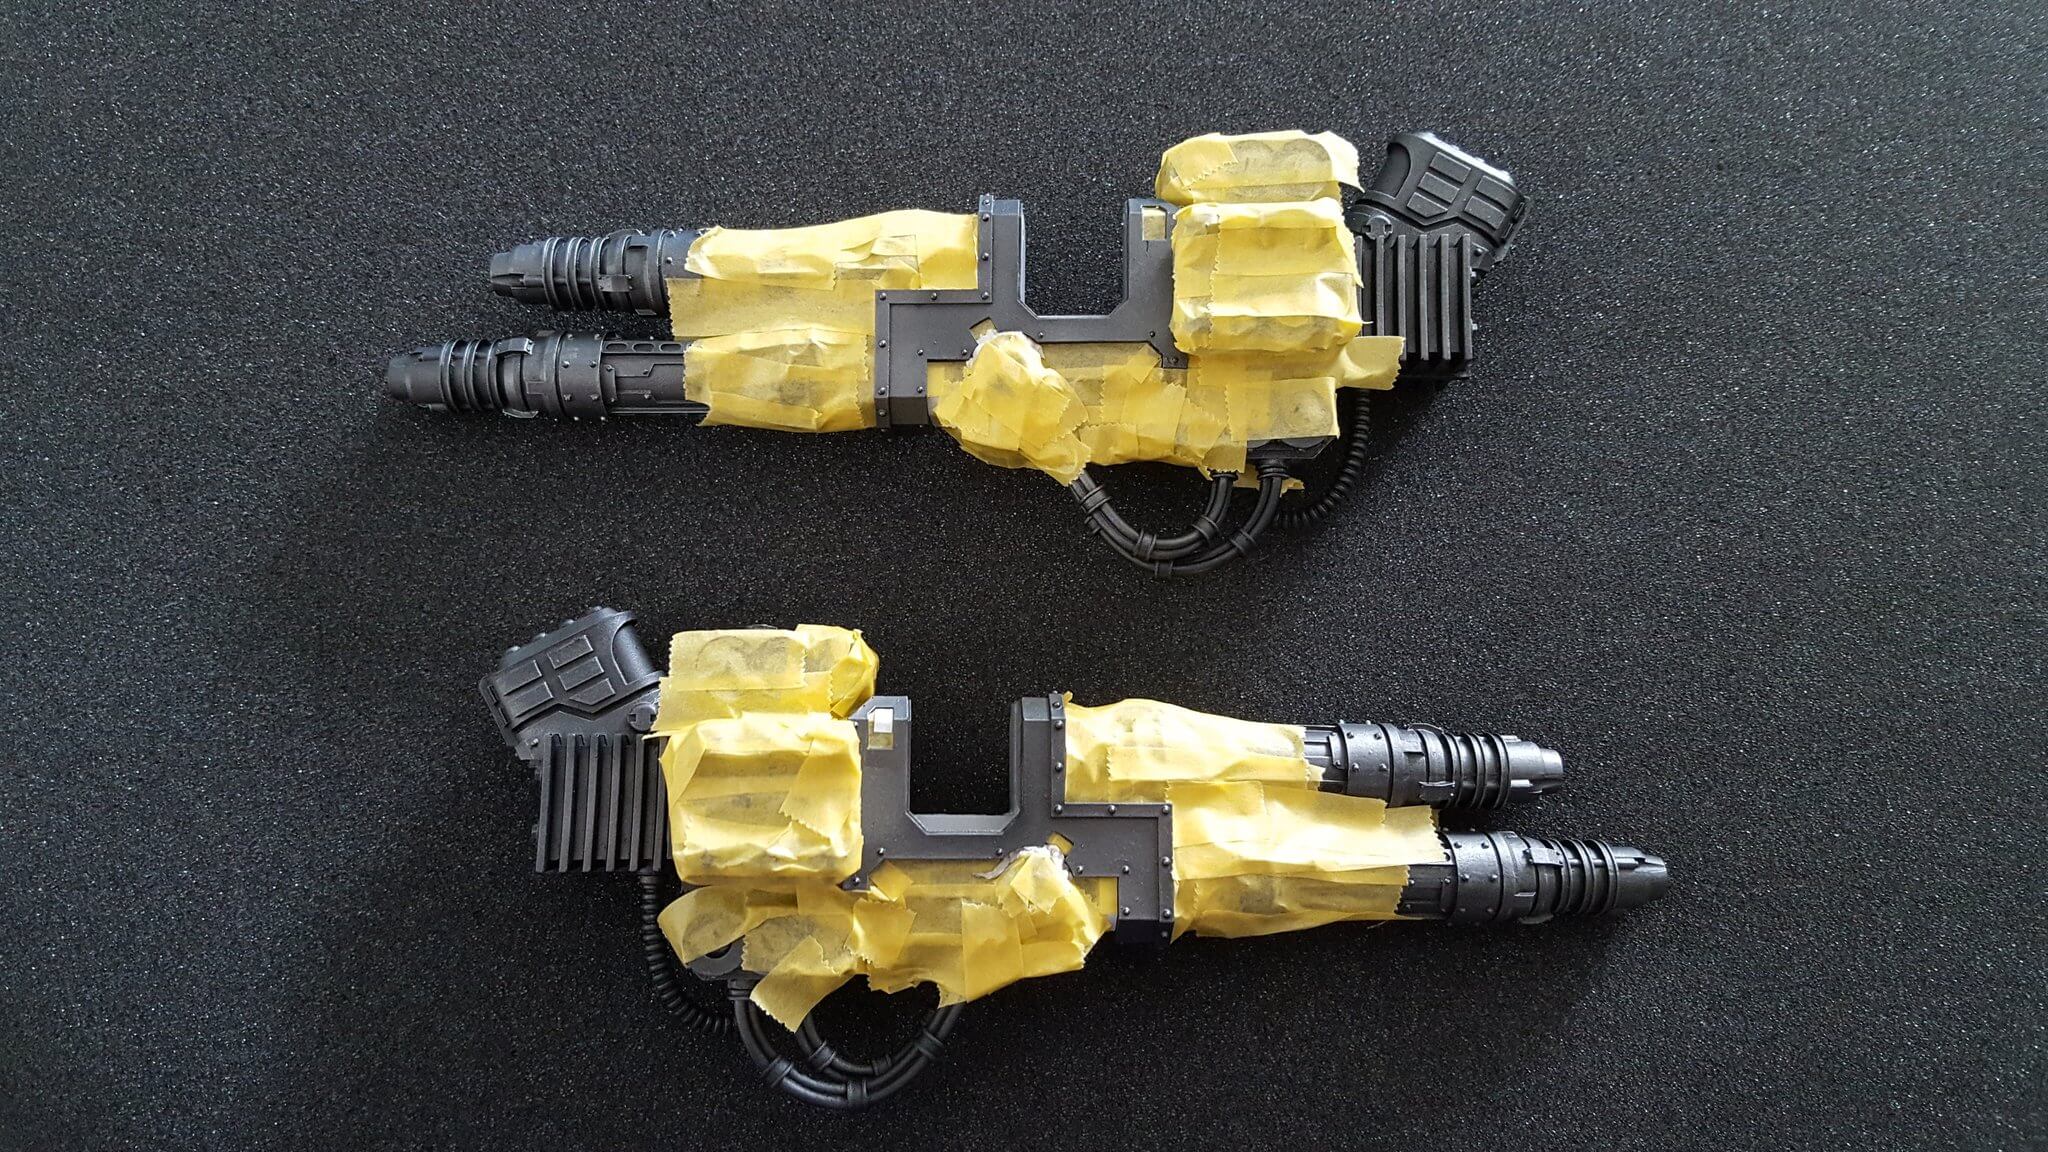
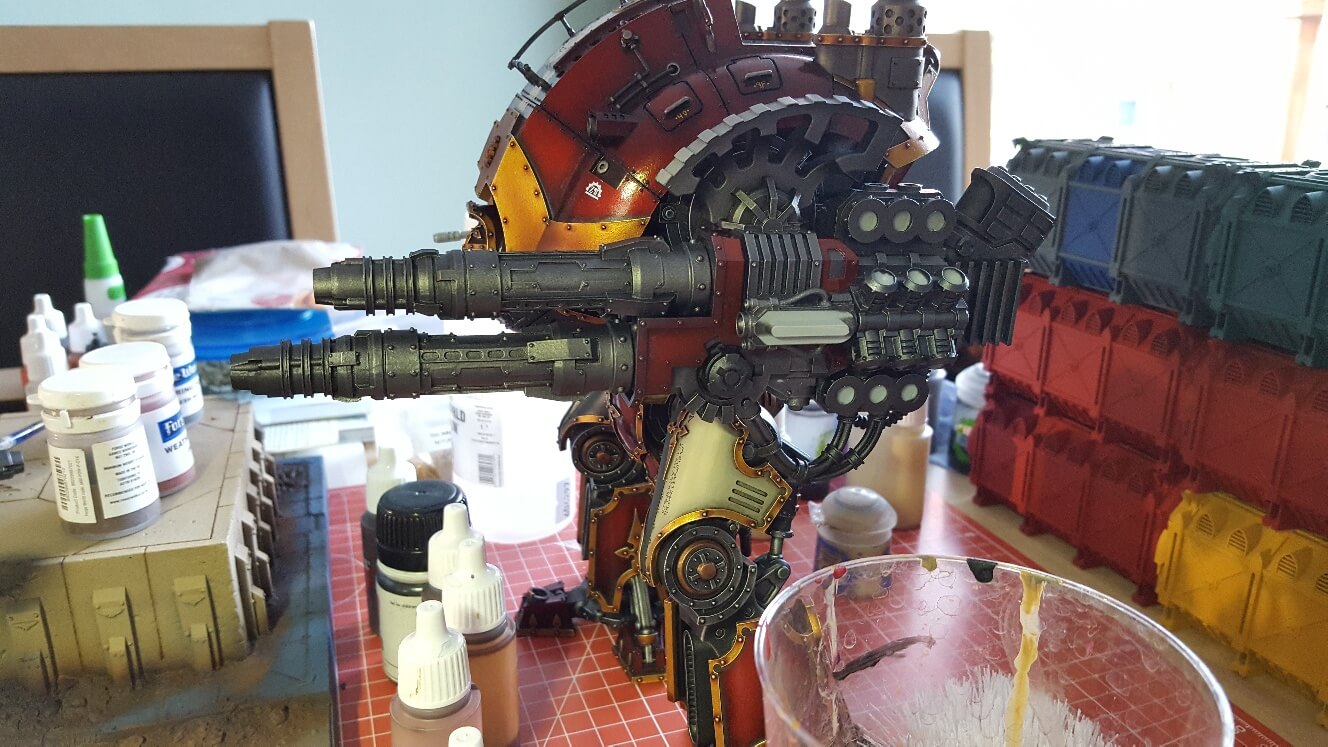 Next up I spent a good three or four hours masking off part of each gun (which I’d avoided dryrbrushing) and followed my usual technique for painting up red. I can now officially say that I’ve used an entire pot of Angron Red… Although this wasn’t a step I wanted to do (it took roughly a day to get the 9 or 10 layers on), I do think it was worth spending the time doing it.
Next up the gold trim got painted up in my usual style and the gloss received an oil wash. I still find this is the best way to add a bit of texture where the trim and armour panel meet.
Painting the pipes
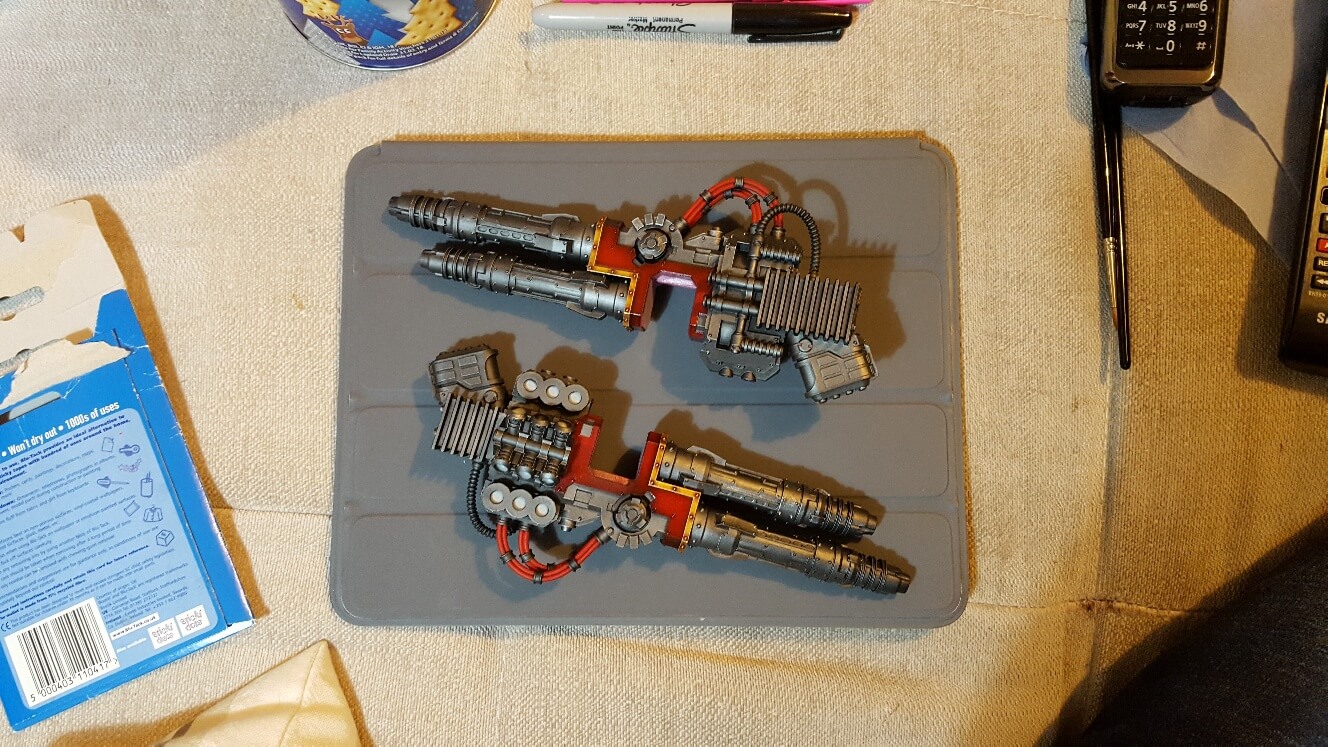 I knew that the pipes needed to done something striking but not too visually distracting so plumped for a really simple Mephiston Red, washed with Carronberg Crimson and then layered back up with Mephiston Red. I think this actually enforces the lethality of the guns a bit more than if I’d done then grey. I’m not confident enough to do yellow and black striped, but guess there’s nothing stopping me going back in the future. Although not shown in the first picture the bands got a Balthasar Gold base coat and wash with Agrax Earthshade. I’ve not done any edge highlights as I wanted to keep the focus on the actual pipe.
Final Touches
Largely that’s all I did on the guns. The big pipes coming out of the rear block were done with Warplock Bronze, an Agrax Earthshade wash and then Balthasar Gold highlight. The lens on the shoulders have been done in my usual style (though a bit quicker than I’d have normally liked – but the look OK). I’ve also done a bit of edge highlighting though may well go back to and improve as the back section hasn’t got as much detail as I’d like. However I’m happy to say the guns for my Knight Porphyrion are finished (for now 😉