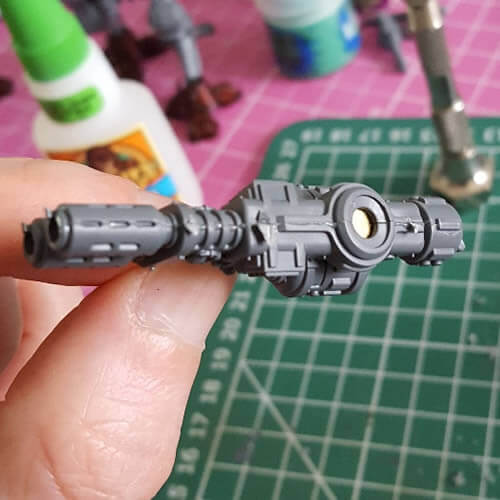
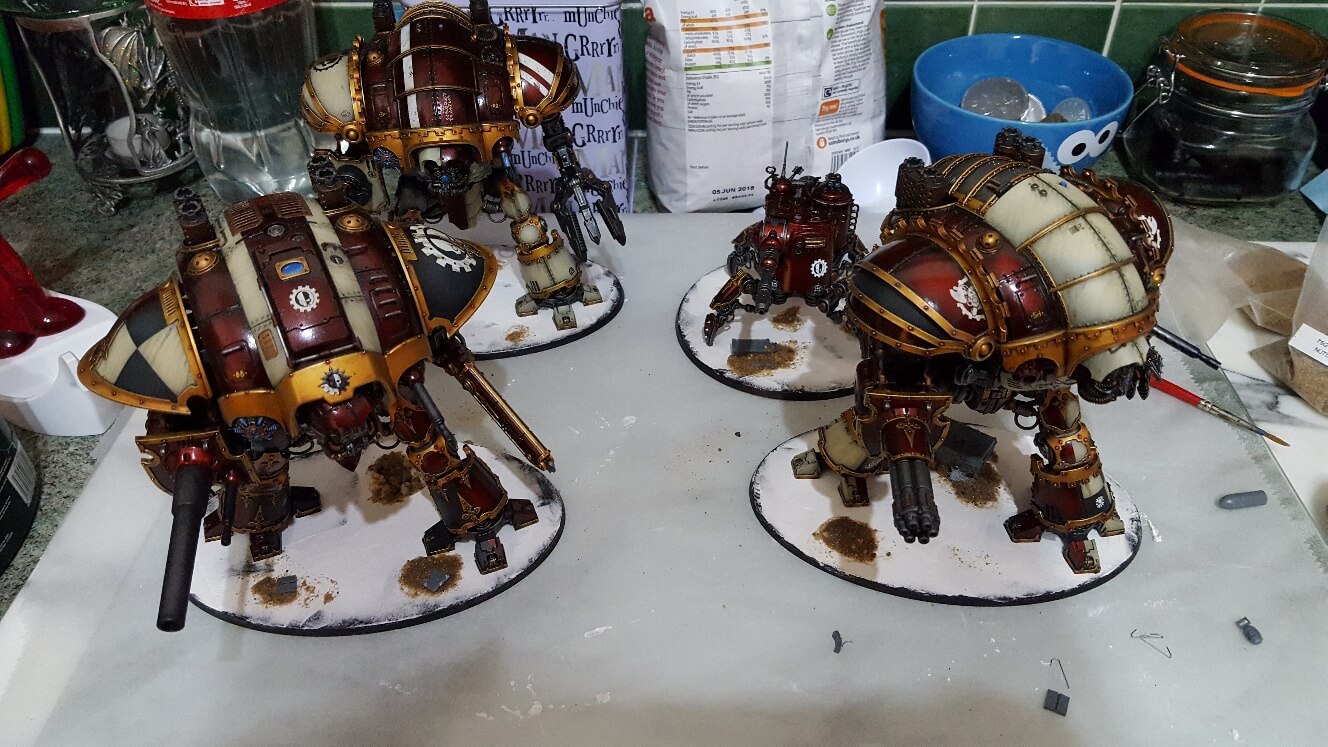
The Imperial Knight Armiger is the smallest addition to the Imperial Knight family. As with it’s bigger brother, future weapon variations are highly likely, so I’ve created this tutorial detailing how to magnetising Knight Armiger weapon arms.
Tag Archives: Imperial Knights
Armies on Parade 2017 – Knight Porphyrion Progress
The third progress post for Armies on Parade 2017 sees some long overdue work on the guns for my Acastus Knight Porphyrion.
Oddly large weapons are one part of models that I struggled with for inspiration. The engineer part of me wants to make sure that the weapon looks technically feasible, but this tends to result in a fairly plain and boring paint job, going “sci-fi” looks better but I don’t actually like the result. For the Knight Porphyrion I was slightly under pressure due to time limits for Armies on Parade, so I stuck with a more basic style with the intention that I can go back at a later date.
Assembling the Knight Porphyrion Arms
I underestimated how big the Porphyrion Arms are and I mean massively underestimated. When assembled, each gun is longer than a regular Imperial Knight stands tall and took ages to get the barrels correctly positioned. I also make life more complicated by magnetising the “shoulder” joint, meant I could only pin the lower of the two barrels. Overall I’m fairly happy – if you look carefully I don’t think the barrels quite line up as well as they could, but you’d struggle to spot it unless you really peer. One of the barrels also wasn’t quite as well cast as it should have been (I got one replaced) but it was far too late to do anything and it’s not immediately obvious.
Painting the gun
Once assembled they got a coat of Vallejo Metal Colour Gunmetal followed by a drybrush of Rub and Buff silver. This might seem completely random (and you’d be right), but the result is a fairly decent metal effect. By not using a wash, you keep the sheen of the airbrush paint and the rub and buff provides a phenomenally smooth and soft highlight. If I have time I’ll pop an edge highlight on there, but that’s not urgent. The back heatsink got a coat of Vallejo Metal Colour Burnt Iron which just adds a nice variety.
Next up I spent a good three or four hours masking off part of each gun (which I’d avoided dryrbrushing) and followed my usual technique for painting up red. I can now officially say that I’ve used an entire pot of Angron Red… Although this wasn’t a step I wanted to do (it took roughly a day to get the 9 or 10 layers on), I do think it was worth spending the time doing it.
Next up the gold trim got painted up in my usual style and the gloss received an oil wash. I still find this is the best way to add a bit of texture where the trim and armour panel meet.
Painting the pipes
I knew that the pipes needed to done something striking but not too visually distracting so plumped for a really simple Mephiston Red, washed with Carronberg Crimson and then layered back up with Mephiston Red. I think this actually enforces the lethality of the guns a bit more than if I’d done then grey. I’m not confident enough to do yellow and black striped, but guess there’s nothing stopping me going back in the future. Although not shown in the first picture the bands got a Balthasar Gold base coat and wash with Agrax Earthshade. I’ve not done any edge highlights as I wanted to keep the focus on the actual pipe.
Final Touches
Largely that’s all I did on the guns. The big pipes coming out of the rear block were done with Warplock Bronze, an Agrax Earthshade wash and then Balthasar Gold highlight. The lens on the shoulders have been done in my usual style (though a bit quicker than I’d have normally liked – but the look OK). I’ve also done a bit of edge highlighting though may well go back to and improve as the back section hasn’t got as much detail as I’d like. However I’m happy to say the guns for my Knight Porphyrion are finished (for now 😉

Armies on Parade 2017 – Progress part 2 (Knight Bases)
In the second progress post for Armies on Parade 2017, I focus on the Imperial Knight Bases for my Questoris Household, it’s something I’ve actually put off for quite a while as I wasn’t entirely sure what I wanted to do.
Armies on Parade Board
I’ve covered this a little more in-depth in a couple of previous posts, but for my Armies on Parade entry I’ve chosen to one of the Forge World Realm of Battle Generatorum Sector boards. This board has a distinctive road section and a number of tiled and raised sections. Although nowhere near as impressive as some Armies on Parade boards that I’ve seen, I feel it’s an improvement over a regular Realm of Battle board section and provides a bit of variety and detail without having to use lots of scenery or build something custom – which potentially will never be used again and will be difficult to store.
Imperial Knight Bases
So, I knew that I had three bases to sort for my Imperial Knight and an extra one if I fancied putting my Dunecrawler in (which it made sense to). My original plan of making them match 100% the board wasn’t going to work – it would be far too time consuming and would look pretty weird when I move the model from their designated spot. So I decided to go for a fairly basic style that should roughly match the road section of the board.
After marking out exactly where the Knights would stand on each base, I applied a thin layer of wall filler with an old credit card, making sure that I got a bit of texture into it. I then used a wet sponge to “dapple” a light texture onto the wet filler and went back in with the credit card to blend it in. The result is an uneven surface similar to the board. This took almost 48 hours to dry properly, after which I covered the whole thing in watered down PVA (not too watered) which soaked into the filler and sealed it without losing any of the texture.
Blitzing through my bits box, I extracted a number of items that would look appropriate as discarded items on a battlefield, so pouches, couple of crates and similar. Copious amounts of PVA, ballast and those items have resulted in little debris piles in a similar fashion to the ones you got on the board. The crates were superglued into place first though most of the other bits are simply secured using PVA.
I felt this was a pretty decent effort, I just need to paint them the same as the road (Skavenblight Dinge, drybrush and some weathering pigments) and jobs a good one! However part of me niggled that they were a little lack lustre, especially to be entered into Armies on Parade. I think part of this was that the ballast I used was overall much finer than the debris on the Realm of Battle board. Then for some odd reason I remembered that somewhere in a cupboard I had a bag of 2mm Talus – very similar in size to the board, so last night I got back out with the PVA and added some of this to the piles of ballast. Much happier with the overall result (wish I’d remembered it earlier)!
Progress on the Acastus Knight Porphyrion
A slightly belated Happy New Year! In this post I go over progress on my Acastus Knight Porphyrion, putting together my AoS Death army and the plans I’ve got for 2017 – needless to say, I’m planning far too much!
I spent quite a bit of time not at home over Christmas, so though I made hobby progress, I didn’t make quite as much as I’d have liked
Unboxing the Forge World Acastus Knight Porphyrion
The Forge World Acastus Knight Porphyrion was unveiled at the Horus Heresy Weekender in February put up for sale last week and I can happily say that I have one of these in my hands and what a beast! Weighing in at 1.6Kg and pretty much the same height as a Warhound Titan the Acastus Knight Porphyrion is a true heavyweight in the arsenal of any Questoris household or as a Lord of War option for a Mechanicum army – that’s right folks, with the experimental rules Forge World have released Legion armies can’t field this model. The rules are also only for 30k and we’re being told by Forge World that the 40k rules are “coming soon” – my belief is that they’ll be included in the Fires of Cyraxus Imperial Armour book rather than as a PDF release.
It’s Wulfen (Thunder) Hammer Time
The last week has been exceptionally busy in the “real world”, so this and a little lack of enthusiasm on my part has meant that the amount of hobby achieved has sadly been fairly low. I have managed to finish the Thunder Hammer on my Wulfen wielding that and Storm Shield. I chose a blue steel colour to contrast against the rest of the grey-metallics by adding a small amount of Drakenhof Nightshade into the Nuln Oil wash. This give the illusion that it’s made from a fairly dense steel.
Last week I received the Forgeworld order that I placed before my trip up to Warhammer World, this consisted of a load of bits for my Mechanicum army – another 6 Thallax (two with Plasma Fussil), a Darkfire Castellax and a Triaros. Over the weekend I started to tidy up the Triaros and must admit that I’m fairly impressed with it. It is a monstrous lump of resin without a doubt, but on the whole it came without too much in the way of flash and mold slips. The tracks are probably the worst, however most of the flash is located on the underside so doesn’t need a “perfect” clean up job (i.e. resculpt) as it’ll be hidden most of the time. I’m planning on magnetising the side weapons and will likely glue and pin the main hull together for extra support.
Using “Challenges” to Motivate
A slightly later post this week because I wanted to be able to post up a bit more progress on my Imperial Knight armour. My challenge last week was to get all of the metallic colours down on the armour plates which I actually managed to achieve before the weekend. Since then (I was away the whole weekend) I’ve managed to get all of the layers of Angron Red down – nine in total! The result is fantastic and was well worth the effort.
This coming weekend is the Horus Heresy Weekender so I’m not going to be able to get much done as there is only a couple of evenings left and I’ve mundane things like the washing to do. I’ll suffice with:
Start spraying Corax Black
Take lots of pictures at the weekender
Although I’m only doing challenges a week at a time, the next challenge will be to mask off the guns so that I can get the red onto those, after that I’ve a mountain of Plaguebearers to undercoat for my brother which I really need to crack out sooner rather than later.
Now rather than finish the post off at that, I’ll waffle on a little bit about motivation. I’ve covered this once before, but this is a topic that I feel needs revisiting every now and again just to keep things fresh.
Cherries and Candies
I’m starting to enjoy this 52 week challenge! Week 3’s targets have been comfortably achieved and I’ve done a few other bits to boot!
Firstly I’ve created myself a Twitter account. Although I’m generally against “personal” Twitter accounts where people post up the fact they’ve just made a sandwich or gone to the toilet, I can’t deny how easy it is to post up work in progress shots in comparison to every other method out there, plus hash-tagging as you go means it’s really easy to share pictures within the appropriate circles. Secondly I’ve started up a WIP of my Knights on the 30k Forums. I joined up months ago but in an effort to keep a bit of momentum going thought it made sense to start a WIP and get my face known a bit more. Continue reading
Week 2 Challenge – Walk Upon the Cracked Earth!
I have a somewhat smug feeling currently having quite comfortably completed my Week 2 goals! All three Imperial Knights chassis/skeletons have been finished as far as I can without the armour plates in place. On top of this I’ve managed to magnetise the rocket pod onto the back of one of the carapaces. I ended up using four magnets in total, with three different sizes. Unlike other solutions, the magnet in the rocket pod is actually drilled and glued in place, most others just cut the stalk off and superglue a magnet that I’m sure snaps off fairly regularly.
I’ve done a little bit of work on one of the bases and have cut up parts from an old Tau tank and glued some in place along with some little crystals I picked up. I’ll need to make sure that I don’t go overboard with Xenos bits and pieces as I’m hoping to be able to use my Knights as part of a 30k Questoris Household.
My Week 3 challenge is going to need to be a little more flexible because the temperature in the UK has dropped quite a bit which prevents using spray primers and similar.
Prepare all armour plates (decorations, gap filling, washing) – including spares
a) Undercoat all armour plates Chaos Black
b) Complete all 3 bases
Imperial Knight Progress and Vallejo Metal Color
Well it’s not quite a Sunday post, but it’s a post within a week and quite a long one at that 🙂 Firstly an up to date progress shot of my three Imperial Knights. As you can see (or not, the winter weather doesn’t make it easy to take a photo with a phone camera), the majority of the metallics have been done. I’ve still a few odd fiddly bits and bobs to do, such as pipes and smaller details which I hope to work on over the next week or so. Most importantly I’ve sorted out the resin weapons for the Maegera which I’ve been putting off for a while. The power gauntlet isn’t finished (as you can see it’s not even undercoated) and I’ve also a Thermal Cannon that I need to finish off now that I’ve bought a spare elbow joint. All of the weapon arms are magnetised primarily for storage but also so that I can use my Maegera as a normal Knight if I want. I’ve also a couple of carapace weapons.
One thing I’m really chuffed with is how well the blue glowing elements have turned out – the Plasma-fussil and Ionic Flare Shields really do pop in the mass of grey-metal and I’m currently considering if I should add some more blue glowing bits in vents and such like to break up the monotony of steel.
As I mentioned in my summary last week, since I’ve been doing these, I’ve purchased some Vallejo Metal Color paints. These new paints have allowed me to add some more techniques into my repertoire of painting metallics. In the above picture the heads have all been painted using the new paints with minimal washes and they do pop more than the dulled down chassis.