Deprecated: Using null as an array offset is deprecated, use an empty string instead in /home/pa-syco/public_html/runebrush/wp-includes/class-wp-block-type-registry.php on line 168
Deprecated: Using null as an array offset is deprecated, use an empty string instead in /home/pa-syco/public_html/runebrush/wp-includes/class-wp-block-type-registry.php on line 168
Deprecated: Using null as an array offset is deprecated, use an empty string instead in /home/pa-syco/public_html/runebrush/wp-includes/class-wp-block-type-registry.php on line 168
Deprecated: Using null as an array offset is deprecated, use an empty string instead in /home/pa-syco/public_html/runebrush/wp-includes/class-wp-block-type-registry.php on line 168
Deprecated: Using null as an array offset is deprecated, use an empty string instead in /home/pa-syco/public_html/runebrush/wp-includes/class-wp-block.php on line 257
Deprecated: Using null as an array offset is deprecated, use an empty string instead in /home/pa-syco/public_html/runebrush/wp-includes/class-wp-block-type-registry.php on line 168
Deprecated: Using null as an array offset is deprecated, use an empty string instead in /home/pa-syco/public_html/runebrush/wp-includes/class-wp-block-type-registry.php on line 168
Deprecated: Using null as an array offset is deprecated, use an empty string instead in /home/pa-syco/public_html/runebrush/wp-includes/class-wp-block-type-registry.php on line 168
Deprecated: Using null as an array offset is deprecated, use an empty string instead in /home/pa-syco/public_html/runebrush/wp-includes/class-wp-block-type-registry.php on line 168
Deprecated: Using null as an array offset is deprecated, use an empty string instead in /home/pa-syco/public_html/runebrush/wp-includes/class-wp-block-type-registry.php on line 168

This week has seen me start of painting up two of the Khorne Slaughterpriests I’ve got, which seems to be a common theme due to the one being given away for free on the September 2016 issue of White Dwarf. Because I’ve no real time constraints or pressures I’m spending a bit longer on painting them up rather than the fairly standard paint jobs I’ve done on the rest of my Bloodbound.
Now don’t get me wrong the Warhammer TV videos by Duncan which I’ve used are brilliant and produce well above tabletop quality models – they’ve allowed me to get a playable army painted in under six months after-all. What I’m not keen on is the finish on the flesh, which although fine for a rank and file model lacks the depth and tone I personally like for character models.
Because I’m spending a bit more time I’m going to post a few articles on what I’ve been doing and explain what colours and paints I’m using – thought it’s a bit more interesting than my usual procrastination 🙂
Assembling the Slaughterpriest
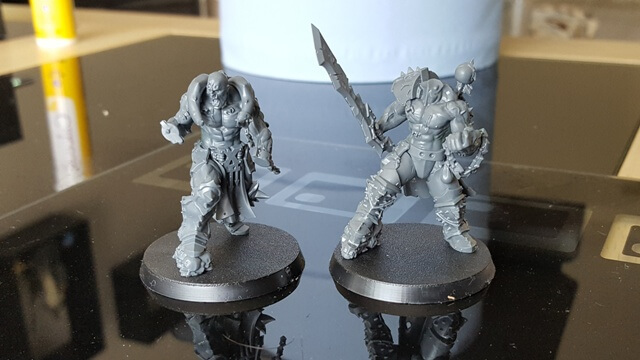 The first job was to tidy up the models and work out what sub-assemblies I would use. I’m painting up one of each Slaughterpriest and did various test fits beforehand. Personally I found the model wielding the Bloodbathed Axe a nicer model to assemble and had a lot less filling needed. The model with Hackblade and Wrath-hammer somehow just didn’t seem to be quite as seamless and I had to use quite a bit of liquid greenstuff to sort out where the arms joined and the two torso pieces. Any sub-assembly needs to fit without requiring any filling so I ended up only using a few. The Slaughterpriest with Axe just had the Axe left off and the other had the helmet and loin cloth left off. This allowed me fairly easy access to all parts of the model.
Both models then got the usual coat of Chaos Black undercoat.
Part One – The Flesh
The biggest expanse on both models has to be the flesh which is also probably the most prominent part of the miniatures too. As this was going to be different to the rest of the flesh I’d painted for the army, I decided to go for something completely different and wanted to aim for a pale and almost alabaster finish with cold hues to contrast with the warm red and brass armour. This would also make things like the hooks in the flesh look that bit more stark.
I did a few tests and quickly realised that the flesh was going to need a base colour applied over the black to ensure the coverage wasn’t patchy, this would also add a very subtle hue to the top layers. As with all of the rest of the army I went for Rakarth Flesh which provides a fairly neutral brown flesh (no pink).
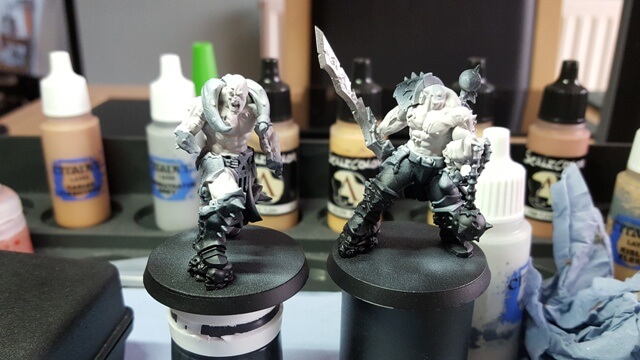 After a bit of experimentation I settled for a flesh mix made from Vallejo Air Grey White with a tiny touch of Mephiston Red and a tiny touch of Bugmans Glow and when I say tiny touch that’s very much what I mean, just enough to add some warmth to the grey. I’ve got a load of disposable flip-top pots so made up a sensible quantity of this colour. I started off applying this colour by hand initially but the finish was awful (the product of the grey being an airbrush paint) so ended up applying it with the airbrush in the end. Although this did overspray the coverage was superior and allowed me to add a drop of white into the mix and apply a gentle top-down highlight. I left this overnight as I always find Vallejo Air paints seem to take a while to cure.
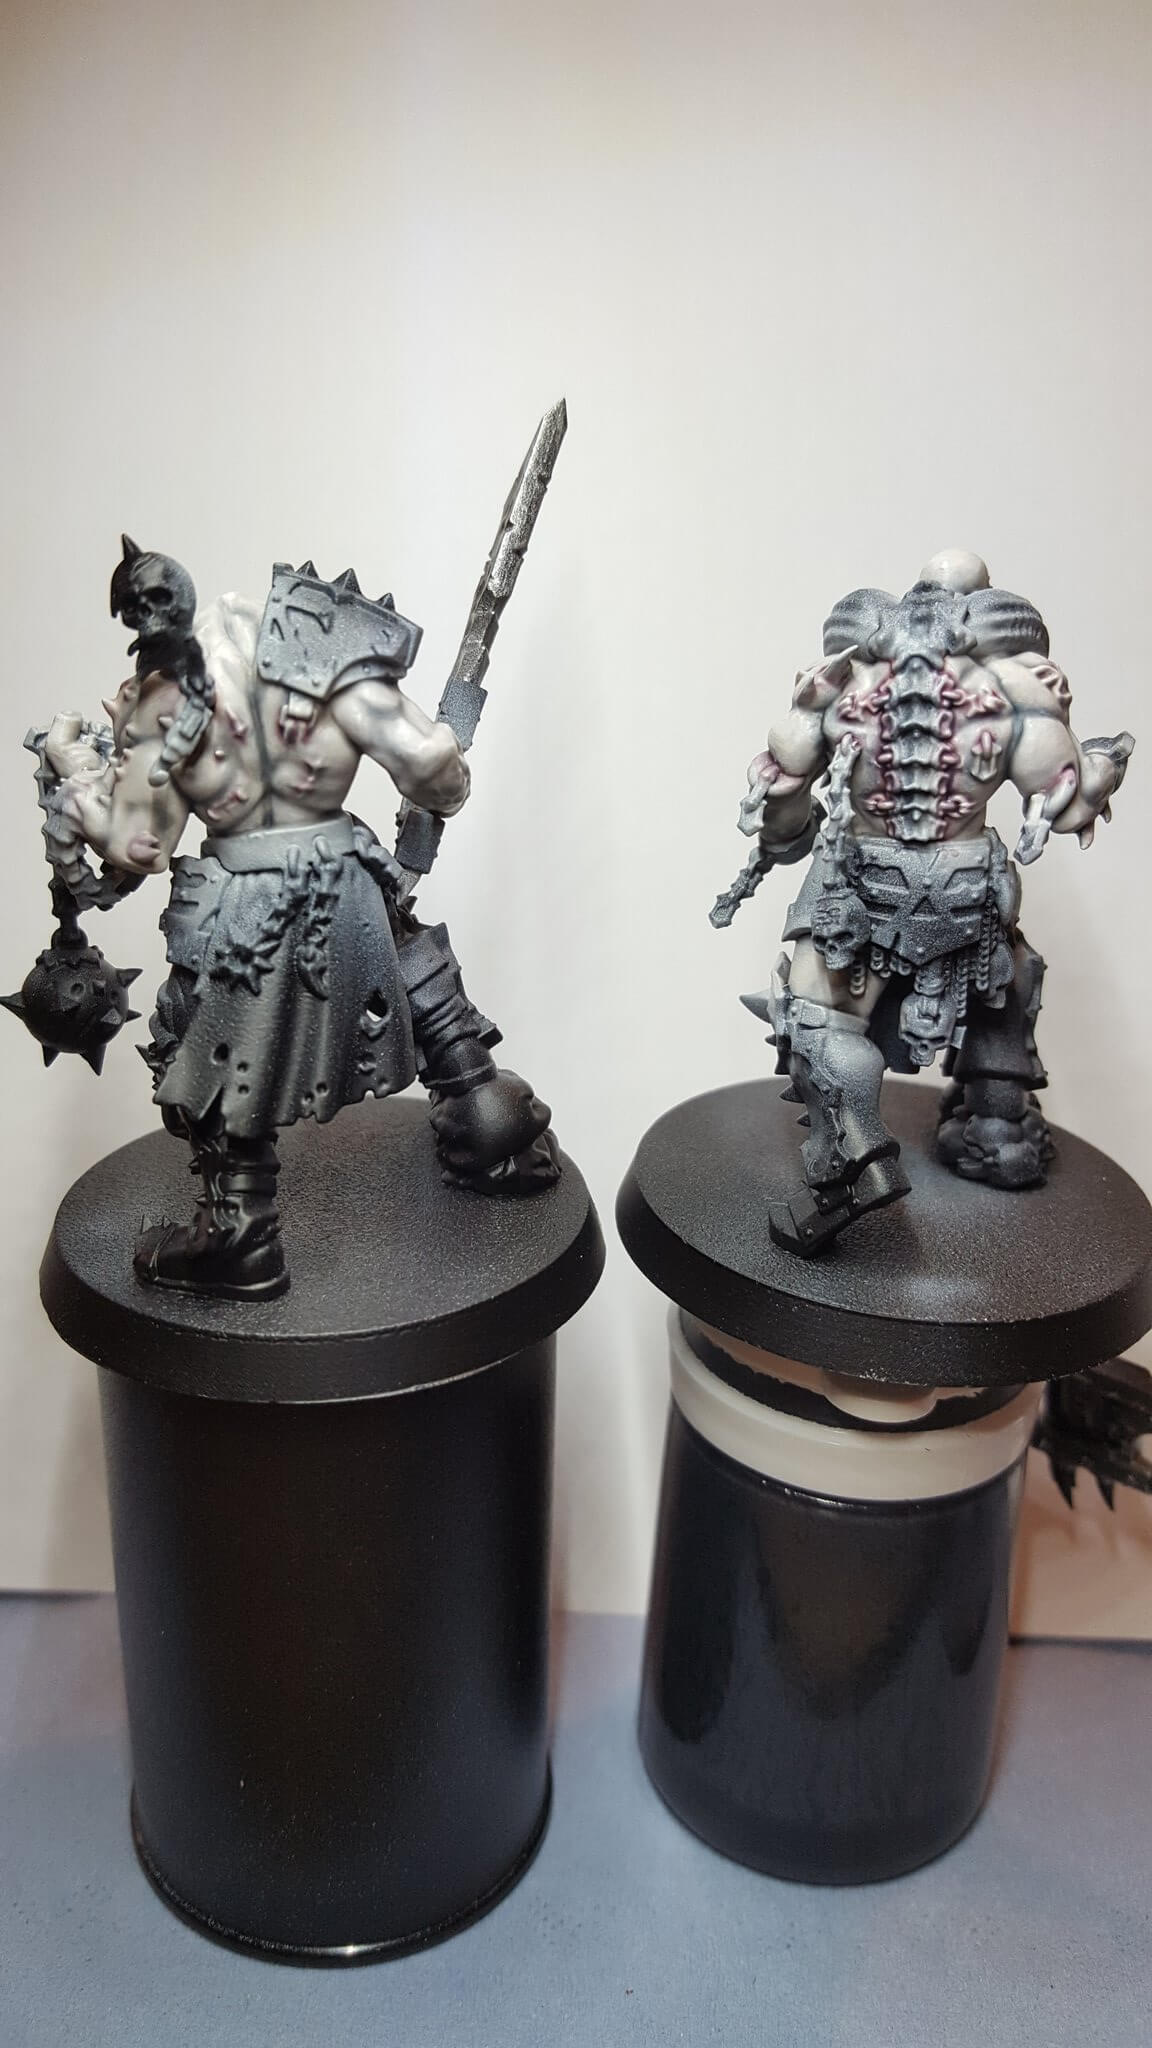
Adding depth was the next job and involved a lot of thin washes. I applied two washes of Drakenhof Nightshade thinned with Lahmian Medium using a 1:10 ratio – yes we’re talking very thin and carefully applied rather than slathered on – it will take a good 20 minutes to dry between shades too! I then used the same shade but thinned at 1:6 and applied this broadly to most of the shadows, I flitted between the two models to ensure that the shadows were equally as dark as the other before mixing up a wash of Drakenhof Nightshade, Reikland Fleshshade and Lahiman Medium (1:1:8). This was very carefully applied to the shadows where the warm brown gave the impression that the skin belongs to a flesh and blood creature, if I’d been painting a vampire or similar I likely would have added a purple or green instead.
Once that was all dry I then went back to a 1:6 Drakenhof Nightshade mix and gently pushed the shadows even further. By using a blue after the warmer wash you reinforce the cold colour. This is the point when you can also push some shadows harder than others, for example around alot of the chest detail.
Again I gave the models overnight to make sure that all the washes dried out OK with no chalkiness – because everything has been thinned with Lahmian Medium you shouldn’t actually get any white patches, but it always pays to be careful.
Scars and Hooks
Both Slaughterpriests have a variety of things poking out and hooked into their flesh along with a few open wounds. It would be easy to either ignore or go over the top with these so I played the slightly safe ground and instead thinned down some Carronberg Crimson with Lahmian Medium and carefully painted it around all of the spines, hooks and other items including the exposed spine. One or two items received multiple coats and the big scar on the front of the model with Hackblade had the scar and staples lined with Mephiston Red and then Khorne Red. I probably didn’t need both colours but I fancied it gave a slightly richer effect – they’ll get a bit of Blood for the Blood God at the end too.
Highlights
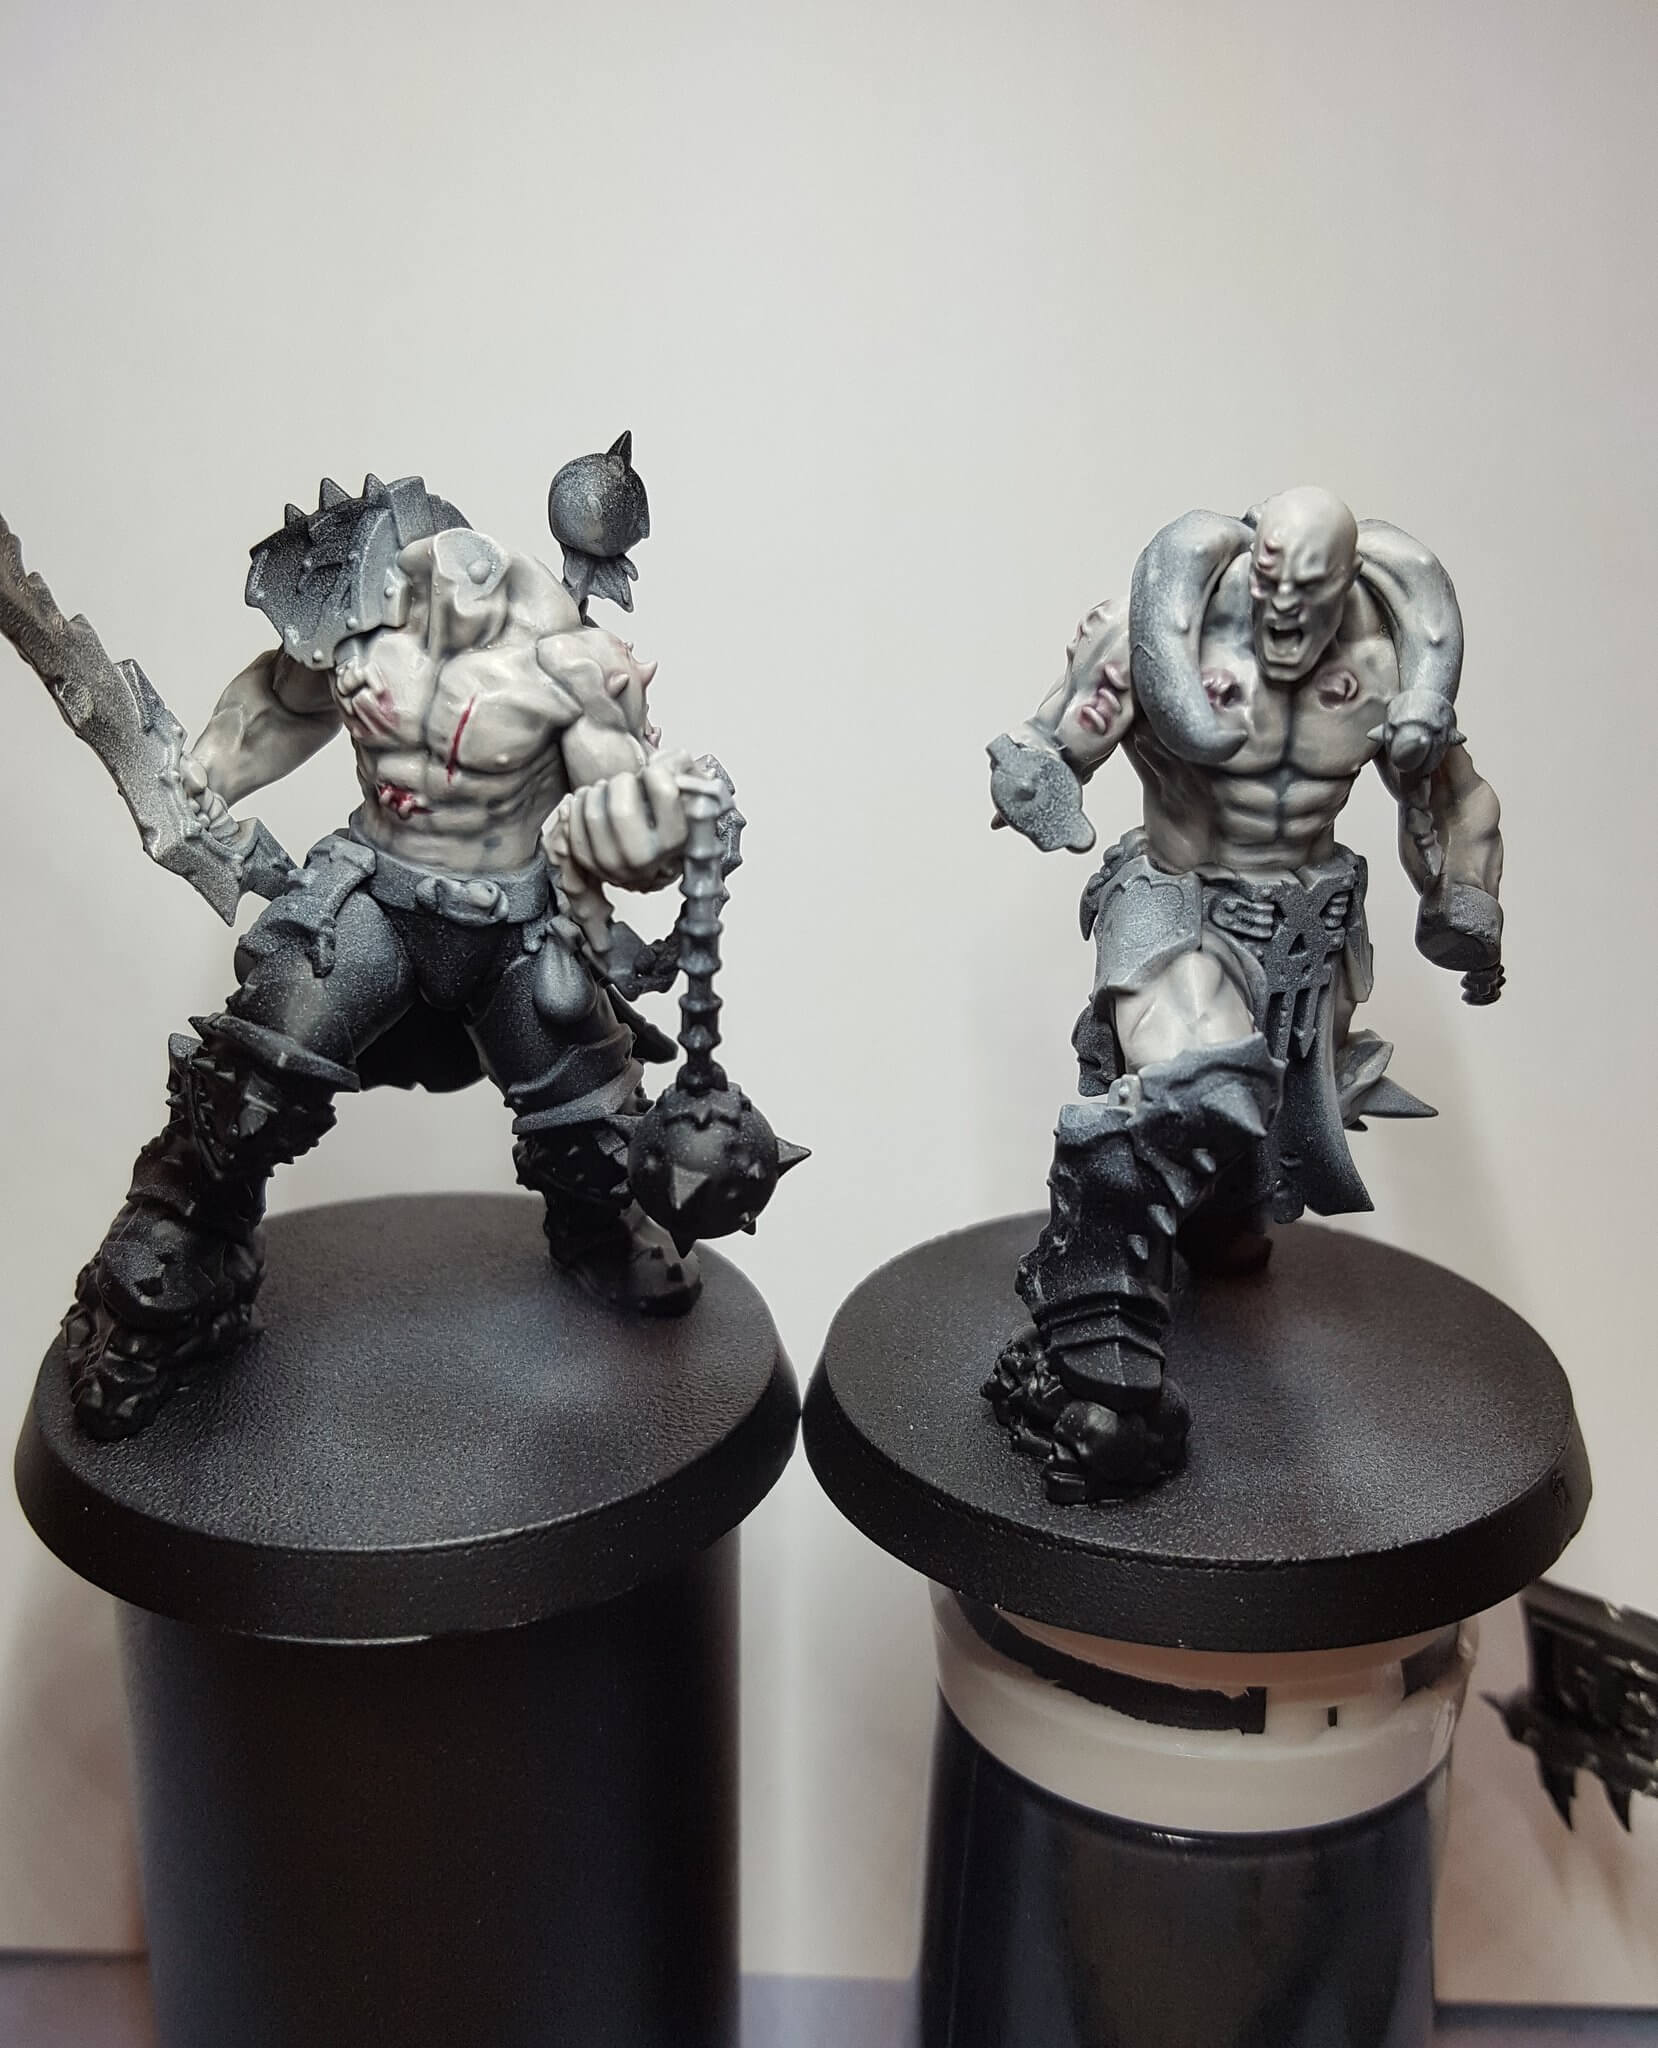
I then went back to my base colour to reset and defined the muscles – it’s surprising how much two light washes actually darken a colour down. Highlights were applied using Pallid Wych Flesh and that was the actual flesh finished – although I appear to have missed his nipples…
1 thought on “Painting the Khorne Slaughterpriests – Part One: Pale Skin”