Deprecated: Using null as an array offset is deprecated, use an empty string instead in /home/pa-syco/public_html/runebrush/wp-includes/class-wp-block-type-registry.php on line 168
Deprecated: Using null as an array offset is deprecated, use an empty string instead in /home/pa-syco/public_html/runebrush/wp-includes/class-wp-block-type-registry.php on line 168
Deprecated: Using null as an array offset is deprecated, use an empty string instead in /home/pa-syco/public_html/runebrush/wp-includes/class-wp-block-type-registry.php on line 168
Deprecated: Using null as an array offset is deprecated, use an empty string instead in /home/pa-syco/public_html/runebrush/wp-includes/class-wp-block-type-registry.php on line 168
Deprecated: Using null as an array offset is deprecated, use an empty string instead in /home/pa-syco/public_html/runebrush/wp-includes/class-wp-block.php on line 257
Deprecated: Using null as an array offset is deprecated, use an empty string instead in /home/pa-syco/public_html/runebrush/wp-includes/class-wp-block-type-registry.php on line 168
Deprecated: Using null as an array offset is deprecated, use an empty string instead in /home/pa-syco/public_html/runebrush/wp-includes/class-wp-block-type-registry.php on line 168
Deprecated: Using null as an array offset is deprecated, use an empty string instead in /home/pa-syco/public_html/runebrush/wp-includes/class-wp-block-type-registry.php on line 168
Deprecated: Using null as an array offset is deprecated, use an empty string instead in /home/pa-syco/public_html/runebrush/wp-includes/class-wp-block-type-registry.php on line 168
Deprecated: Using null as an array offset is deprecated, use an empty string instead in /home/pa-syco/public_html/runebrush/wp-includes/class-wp-block-type-registry.php on line 168
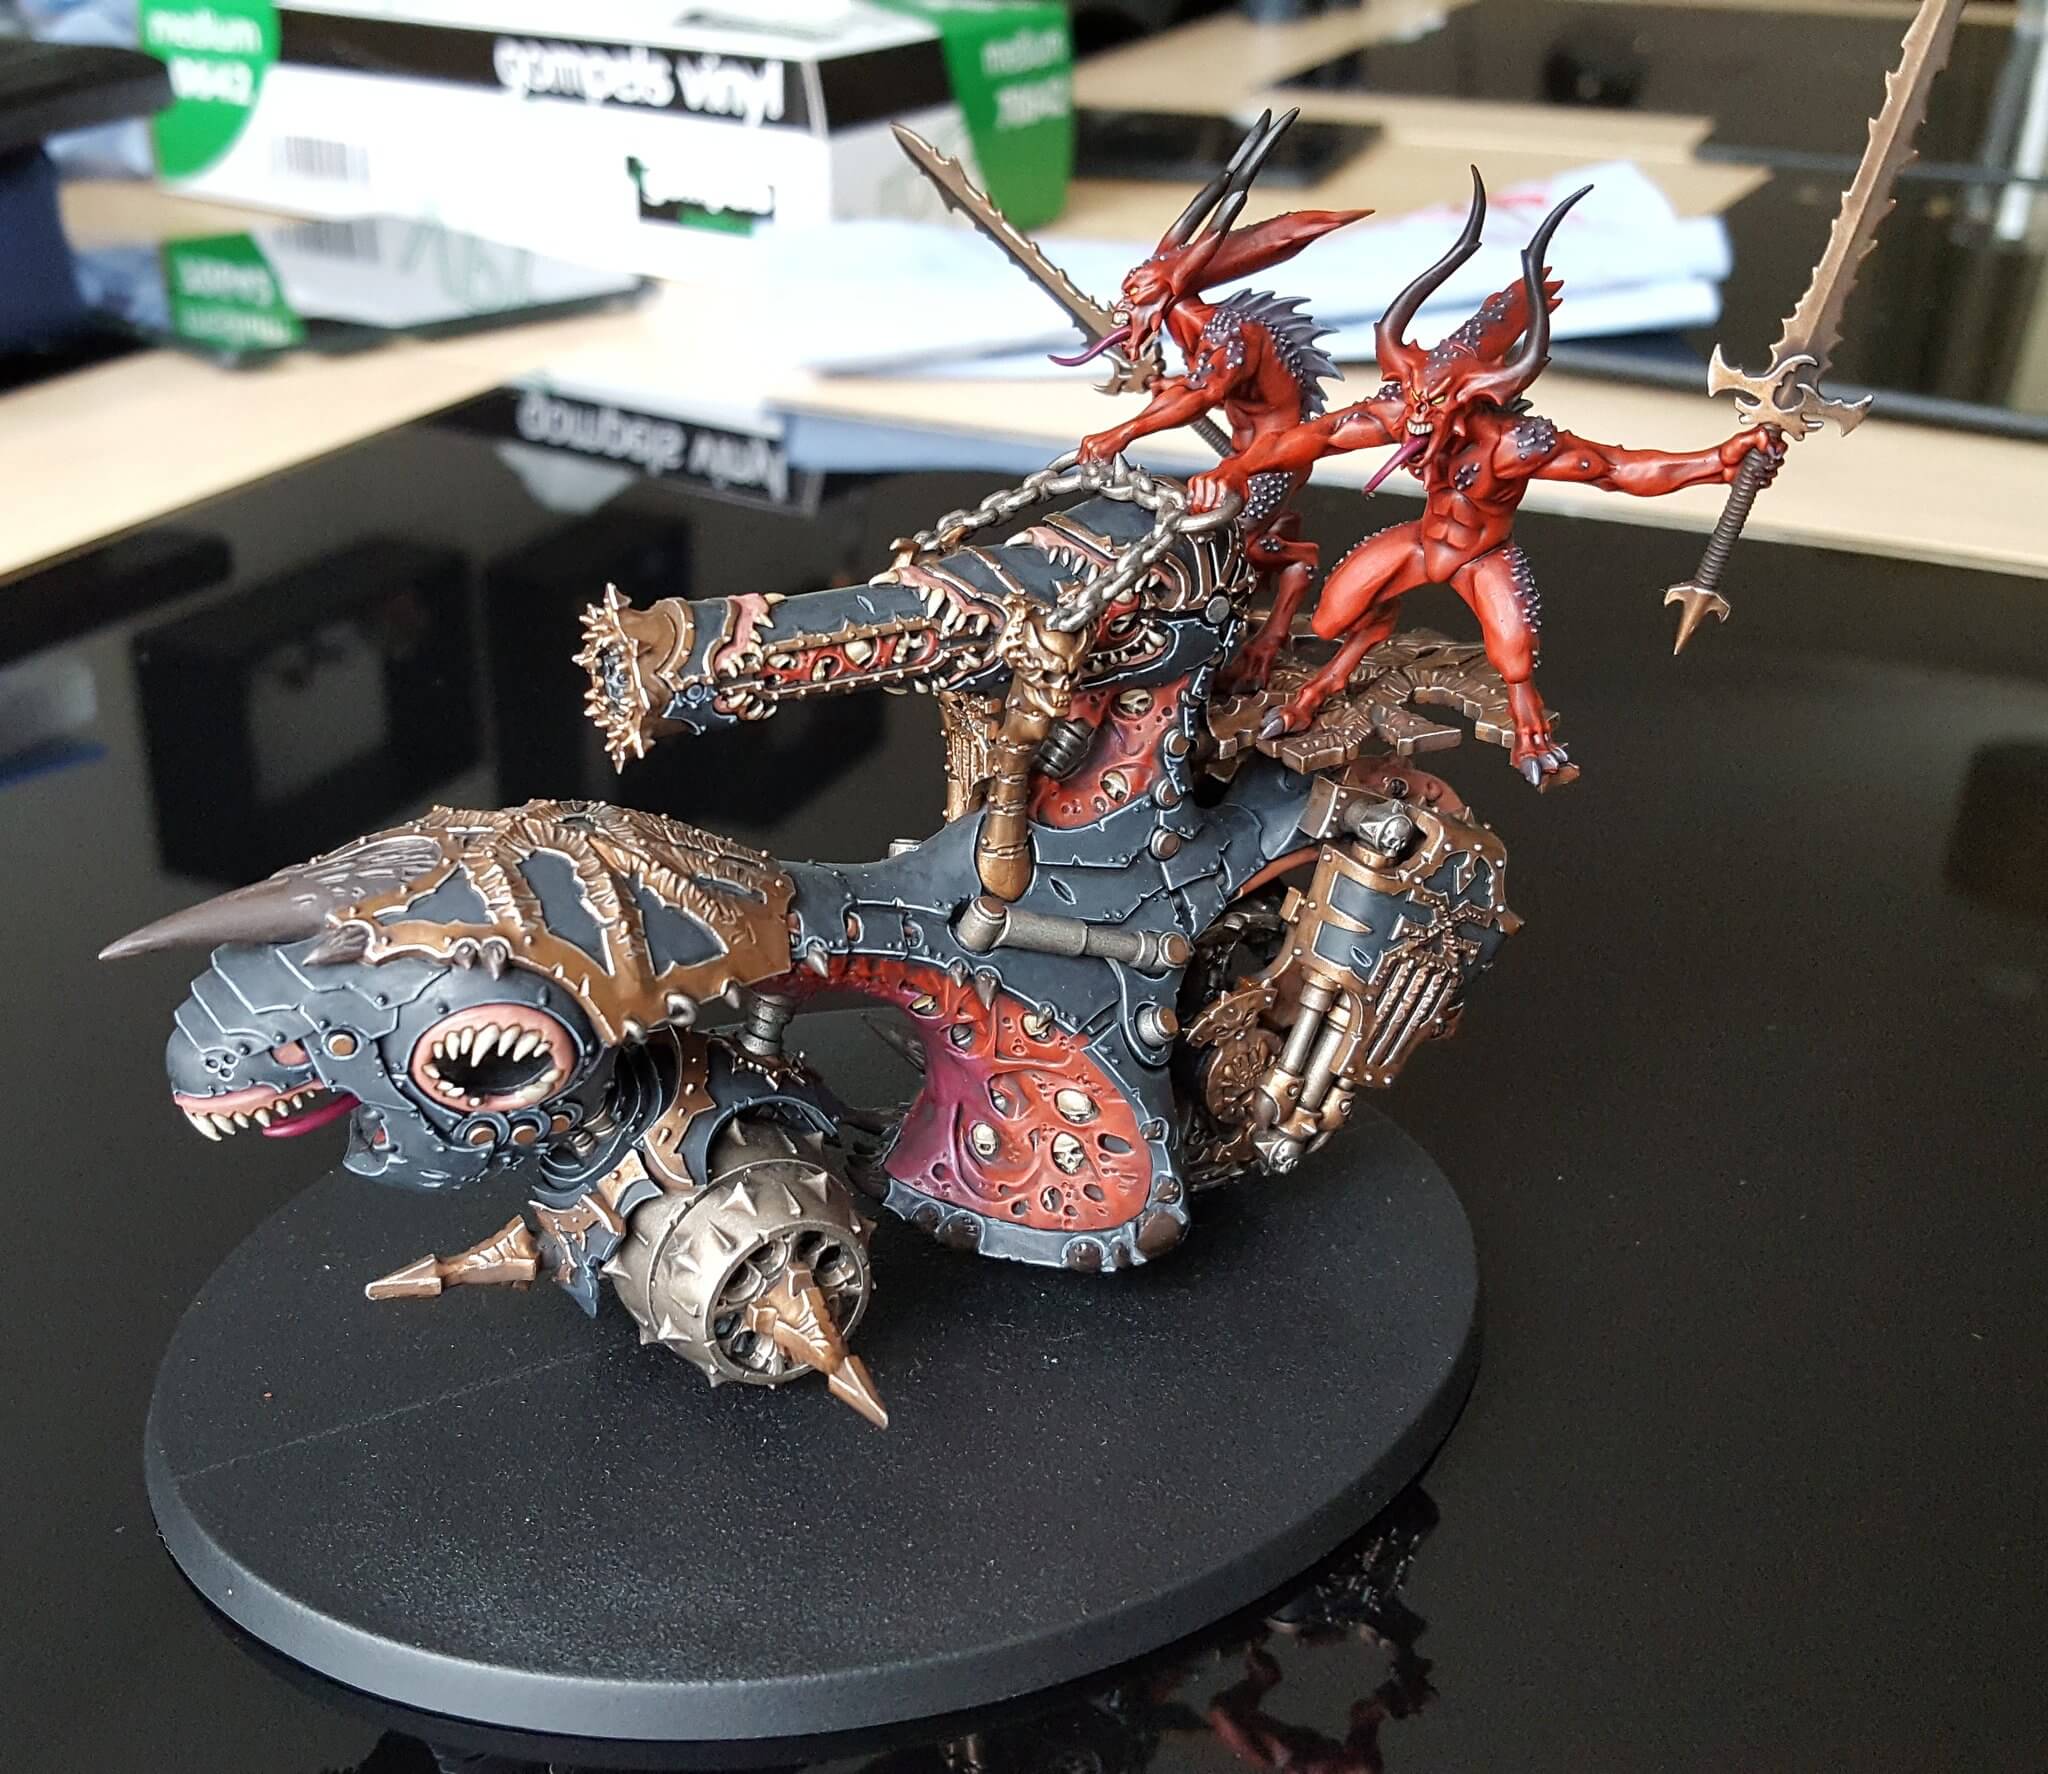 I’m very pleased to say that I achieved my goal of getting my Khorne Skull Cannon painted! I’ve got to varnish and sort the base out but in principal I’ve another unit to add to my Goretide – which actually would transfer over to 40k too.
So in a change from my regular procrastination this post will be a handful of photos and some information on how I’ve painted the various bits and how I’d suggest anybody doing one could go about it (learning from my mistakes).
Putting the Khorne Skull Cannon together
First off, as I have said previously the Khorne Skull Cannon is an exceptionally fiddly kit, not so much in terms of lots of little pieces but more that a lot of the kit needs assembling prior to painting. My original intention was to leave the large back carapace off but it has a snap fit that means you’d likely chip off paint if you left it off. The end result was three sub-assemblies and the two armour panels that cover the pistons at the back – oh and the tongue. I left the front wheel as one unit as this allows you to paint the underbelly of the carriage.
Painting the Khorne Skull Cannon
As with the rest of my Bloodbound, I gave everything a coat of Chaos Black spray and left it to dry out overnight. Because I was going to paint the armour panels black, I gave all of the armour a coat of Forge World Corvus Black from the airbrush. This is a really nice charcoal grey colour and means you can actually shade it, unlike a pure black.
What is probably my biggest gripe of the kit is that the only way to paint the model is to physically hold it and twist and turn to gain access to everything. This means that you need to wear disposable gloves or similar to ensure you don’t get fingerprints all over the black armour. Even using gloves you’ll find that you get a handful of points that get rubbed – the banding on the top of the cannon, the front horn, the ends of the front wheel and the front of the mouth. What this means is that those items need to be highlighted as one of the last things else you’ll be rubbing off the highlights which are much harder to fix afterwards.
One mistake I made was to initially wash all of the armour with Nuln Oil. This was a stupid move as I discovered that washes rub off quite quickly with frequent handling!
The first job was to paint the front wheel sub assembly and the silver metallic’s on the pistons and read wheel. These were a simple job of a base coat of Leadbelcher, followed by a wash of Nuln Oil and then a careful drybrush of Necron Compound. The final highlight would be done with the rest of the metallics. I also gave the front wheel trim a coat of Balthasar Gold.
 The underbelly of the carriage and the fleshy parts of the cannon were next and received a coat of Mephiston Red all over. A couple of thin coats of Screamer Pink was painted into the central sections in the same manner as the Khorgorath (I also did this inside the mouth). There are a couple of metal pipes in the belly too which got picked out with Leadbelcher and then the entire underbelly was washed with two coats of Nuln oil, which blends everything in and turns the pink slightly purple. All of the red areas were brought back with a layer of Mephiston Red and edge highlited with Evil Sun Scarlet and then Tuskgor Fur. The purple section just received a basic edge highlight of Genestealer Purple. Finally to finish this off the skulls were picked out in Zandri Dust, washed with Agrax Earthshade and then layered over with Ushbati Bone and given an edge highlight of Palid Witch Flesh (which is an amazing colour).
Next up is painting all of the areas to be brass with Balthasar Gold. This will take forever and you need to focus on keeping the coverage as smooth as possible, two or three coats will be needed and once the paint starts to get thick, discard and start again.
Now is a pretty good point to glue the front wheel assembly into the main carriage. Give it a test fit first and if it doesn’t slide in smoothly, use a round needle file to gently file down the curved notches on the wheel assembly. When it slides in easily use some thin superglue to fix in place.
 I then started on the gnashing maw sections. the gummy parts on the cannon and the flesh pipes at the back. A coat of Bugmans Glow followed by a wash of Reikland Fleshshade. Because there isn’t much of this, on the gums I went a little more detailed and shaded the recesses with a touch of thinned Druchii Violet. Layer up with more Bugmans Glow and then highlight with Cadian Fleshtone. For the pipes I simply used a thinned Carronberg Crimson wash around the split areas and where the pipes connect and then edge highlight with Cadian Fleshtone.
All of the teeth can be painted now in exactly the same way as the skulls.
If you’ve been sensible and didn’t wash the armour panels with Nuln Oil, now is also a good time to touch up the black with more Corvus Black and then wash with a generous (but controlled) covering of Nuln Oil to all of the armour panels. This should add some depth to these areas. I also glued the two piston covers in place with superglue.
The horn protrusions from the armour I gave a coat of Rhinox Hide, washed with Nuln Oil and then an edge highlight of Gorthor Brown followed by Ushbati Bone. Of all the bits I did, I was least happy with how they turned out.
Next step is to carefully give all of the areas you painted Balthasar Gold a coat of Agrax Earthshade, you’ll want to use a brush that allows you to be pretty accurate (GW medium and small base brushes is what I used). If you’ve rubbed any paint off, touch them up before washing.
Now it’s onto the final (and tedious steps): Edge Highlighting… There are two items, firstly the black armour which needs a broad edge highlight of Vallejo Blue Grey and then a final highlight of Vallejo White Grey – although I should have used Fenrisian Grey as I think it’s easier to paint and looks better. All of the metallics need an edge highlight using my “special” paint (a mix of Vallejo Model Air Steel and Citadel Air Runefang Steel). I tended to focus on one section of the model and get that all highlighted before moving onto the next, there’s so much edge highlighting to do that if you stick to one colour it’ll quickly become tedious. The last part I edge highlighted was the cannon itself and I glued the whole Khorne Skullcannon onto the base before doing this as it meant I could be fairly steady.
And that is the Khorne Skullcannon done!
Painting the Bloodletters
The two Bloodletters are exceptionally simple by comparison. Airbrush the bodies Mephiston Red (I do recommend the airbrush paint) to give them the base colour. Thin down some Eschin Grey and give the mottled areas and spines two coat. You won’t have 100% coverage but that’s what we want. The claws and nails you also want Eschin Grey but solid coveage instead.
Now give him an overall coat of Carronberg Crimon and let that dry. All of the grey areas need to be washed with Nuln Oil and the areas around given a second coat of Carronberg Crimson which will give it that deep ruby colour. Layer all of the mottled dots and claws with Eschin Grey and then Dawnstone, then layer up the flesh with Mehphiston Red followed by Evil Sun Scarlet. Finally the tongue needs to be painted Screamer Pink and washed Carronberg Crimson and the eyes dotted with the brightest yellow you have such as Flash Gitz Yellow.
The swords I keep really simple, the handles are done Rhinox Hide with a Nuln Oil wash – no highlight necessary. The brass bits are done my usual Balthasar Gold, Agrax and then edge highlight with my steel mix – this is the same as the base plate is done so do them all at once. One tip is don’t bother highlighting the bottom of that plate – nobody will ever see it! Finally the blades are painted with Forge World Castellax Bronze, followed by a very carefully applied Agrax Earthshade (work it downwards, we don’t want any steaks) and then edge highlighted with Balthasar Gold. It’s a really simple but fairly effective finish. The chain is done with Leadbelcher, Nuln Oil and then highlighted with my steel mix.
Exactly what I was looking for. Thank you!
Glad you’ve found the post useful and I agree this is a really intimidating model for most people. I found that most tutorials online for Bloodletters make them far too bright – fine if that’s what you’re after, but I prefer a darker and “monster from your nightmare” style.
Flesh Hound, I don’t think you can go far wrong with watching the WarhammerTV tutorial where Duncan paints Korghos Khul’s, Fleshhound – it’s some of where I got the inspiration for the Bloodletters.
Very helpful post. This is a really intimidating model for a new collector like myself and it’s really helpful to see your process. I found your process for the Bloodletters to be exactly what I was looking for… there are a ton of youtube tutorials for these guys but none yielded the results I wanted.
Can you recommend a process for the gw resin flesh hounds?