I started off yesterday evening with the best intentions. I cleared an area to work in, got my rivet maker out, lit a candle for the heat and got a load of sprues ready. All I can say is that if anybody can get a Greif Rivet maker to consistantly make uniform sized rivets, please tell me how the hell you do it. I spent over an hour and a half faffing around and managed to make around twenty ‘OK’ rivets.
 So I decided to revert back to Plan A and use 0.79mm ball bearings instead. Though more fiddly and more difficult to manouver due to being glued in place with super glue, the end result is at least more uniform than different sized plastic rivets.
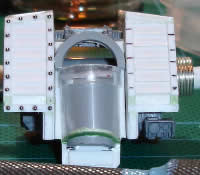
As you can see from the image I’ve got the front of one side done. The photo picked up a number of glue spots and one or two ball bearings that need popping out and re-positioning. Before I hit the sack I managed to drill all of the marked positions on the other side, which went more quickly than the first ones. With hindsight (the most wonderful of things), I should have worked out the positioning on the computer and printed off a ‘ruler’ for each strip of rivets. This would have resulted in a better distribution of rivets along the length of the edging – that said, providing it looks OK, I’m beyond the point of caring. I also got two loops cut and drilled that will allow me to ‘fix’ the cloak on, this biggest annoyance is that the holes need a bit of filling after the loops are glued in – which is going to complicate the fact that I wanted the cloak as a separate assembly.
I’m going to plod on with how I always intended to do the cloak I think. Once dry I’ll have to grease up some wire insert it into the holes, fill them, smooth them off and then pull the wire out. Although it’s not ideal, I’m happy to prime over small areas of not-quite-set putty. I’m also pretty sure that there will be some minor work requried after priming, as this will likely flag up a few areas of imperfection.
So my hit list for this afternoon and evening is:
- Finish riveting – including the items along the top
- Coil wire for gun arm ribbing
- Secure the head into the cowling
- Pin the Chaos Space Marine onto the base (possibly gluing)
- Drill hole into other foot and ankle
- Mock the legs onto the stand (bluetak!)
- Fix the torso onto the legs using double-sided tape, the whole assembly needs to be secure enough to work on
- Glue on wolf pelts, following flow of model direction
- Sculpt cloak shape and place under a 40W light bulb to aid curing
Now this is a comprehensive and long list. I reckon that I’ve got around 4 to 5 hours to get this done, to stand a chance that the cloak will be cured enough to be removed. This will take me to around 6pm-ish, so I then have the evening to further work on the arms, which filling and armour plates added. A few hours of that and the cloak should be dry enough to remove, so I can fill the loop holes, clean off any grease and prime the model with grey primer. That will give it the night to set.
It appears that tomorrow I only have until 5pm as we need to unload the carpet tiles from the car to my brothers flat and likely a number of other things, sadly this only gives me 8 hours to do things, if I get up early and have no lunch… So in reality I’ll have around 6 hours. I ought to have some time on Saturday afternoon/evening, but don’t know if I’ll be up to it, after a day of fitting carpet tiles. Mind you, if I can crack out both bedrooms and the hall in one day, I might glean some of Sunday back. Putting it bluntly, I can’t see me being in a position to airbrush tomorrow unless I get a significant amount of work done on the arms tonight (which is possible). That said, I may be able to get away with not priming the arms, which will ease this situation. The real panic begins to set in when I realise that I have to cover the cloak in fur and complete the base :s