Deprecated: Using null as an array offset is deprecated, use an empty string instead in /home/pa-syco/public_html/runebrush/wp-includes/class-wp-block-type-registry.php on line 168
Deprecated: Using null as an array offset is deprecated, use an empty string instead in /home/pa-syco/public_html/runebrush/wp-includes/class-wp-block-type-registry.php on line 168
Deprecated: Using null as an array offset is deprecated, use an empty string instead in /home/pa-syco/public_html/runebrush/wp-includes/class-wp-block-type-registry.php on line 168
Deprecated: Using null as an array offset is deprecated, use an empty string instead in /home/pa-syco/public_html/runebrush/wp-includes/class-wp-block-type-registry.php on line 168
Deprecated: Using null as an array offset is deprecated, use an empty string instead in /home/pa-syco/public_html/runebrush/wp-includes/class-wp-block.php on line 257
Deprecated: Using null as an array offset is deprecated, use an empty string instead in /home/pa-syco/public_html/runebrush/wp-includes/class-wp-block-type-registry.php on line 168
Deprecated: Using null as an array offset is deprecated, use an empty string instead in /home/pa-syco/public_html/runebrush/wp-includes/class-wp-block-type-registry.php on line 168
Deprecated: Using null as an array offset is deprecated, use an empty string instead in /home/pa-syco/public_html/runebrush/wp-includes/class-wp-block-type-registry.php on line 168
Deprecated: Using null as an array offset is deprecated, use an empty string instead in /home/pa-syco/public_html/runebrush/wp-includes/class-wp-block-type-registry.php on line 168
Deprecated: Using null as an array offset is deprecated, use an empty string instead in /home/pa-syco/public_html/runebrush/wp-includes/class-wp-block-type-registry.php on line 168
 I’m starting to enjoy this 52 week challenge! Week 3’s targets have been comfortably achieved and I’ve done a few other bits to boot!
Firstly I’ve created myself a Twitter account. Although I’m generally against “personal” Twitter accounts where people post up the fact they’ve just made a sandwich or gone to the toilet, I can’t deny how easy it is to post up work in progress shots in comparison to every other method out there, plus hash-tagging as you go means it’s really easy to share pictures within the appropriate circles. Secondly I’ve started up a WIP of my Knights on the 30k Forums. I joined up months ago but in an effort to keep a bit of momentum going thought it made sense to start a WIP and get my face known a bit more.
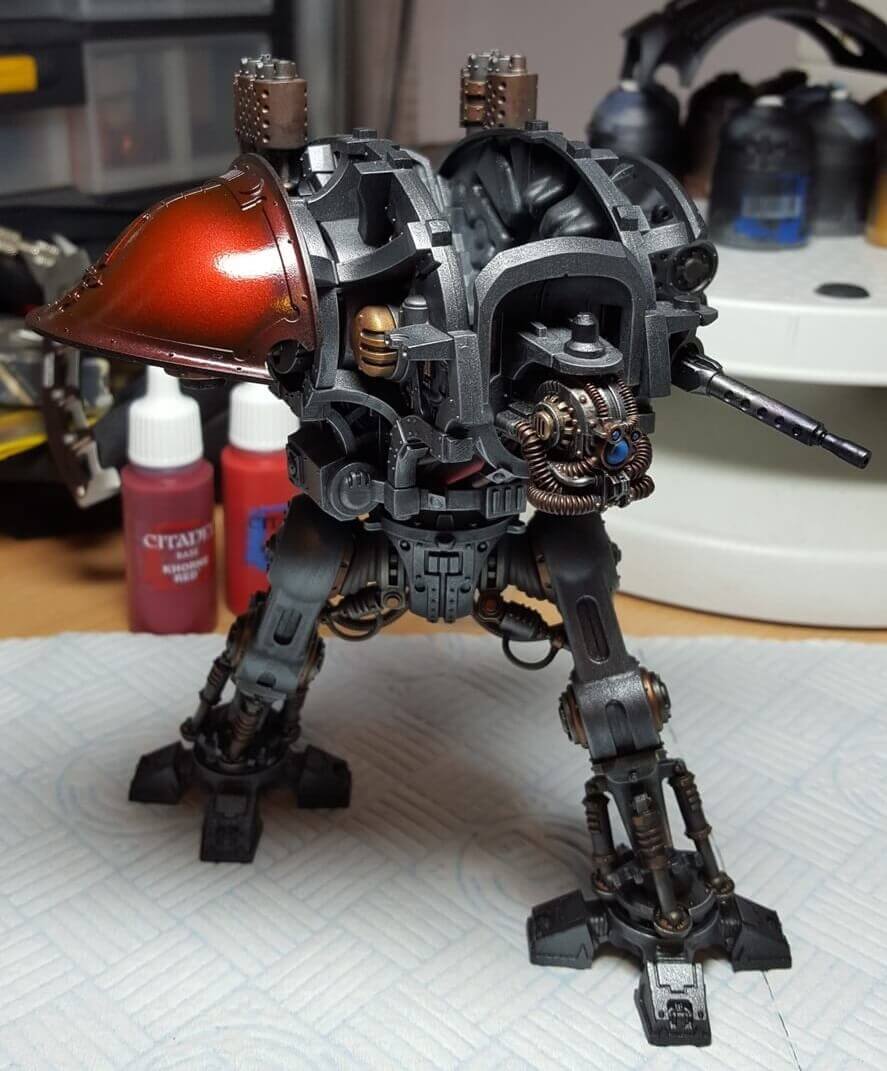
The cold snap of weather that I wrote about last week didn’t really come to anything and thankfully on Friday and Saturday it was mild enough that I managed to undercoat all of the armour plates of my Knights – picking up an extra can of black on the way home from work Friday was a good idea… This meant that over the weekend I was able to experiment with the airbrush to find out what finish I want to go for.
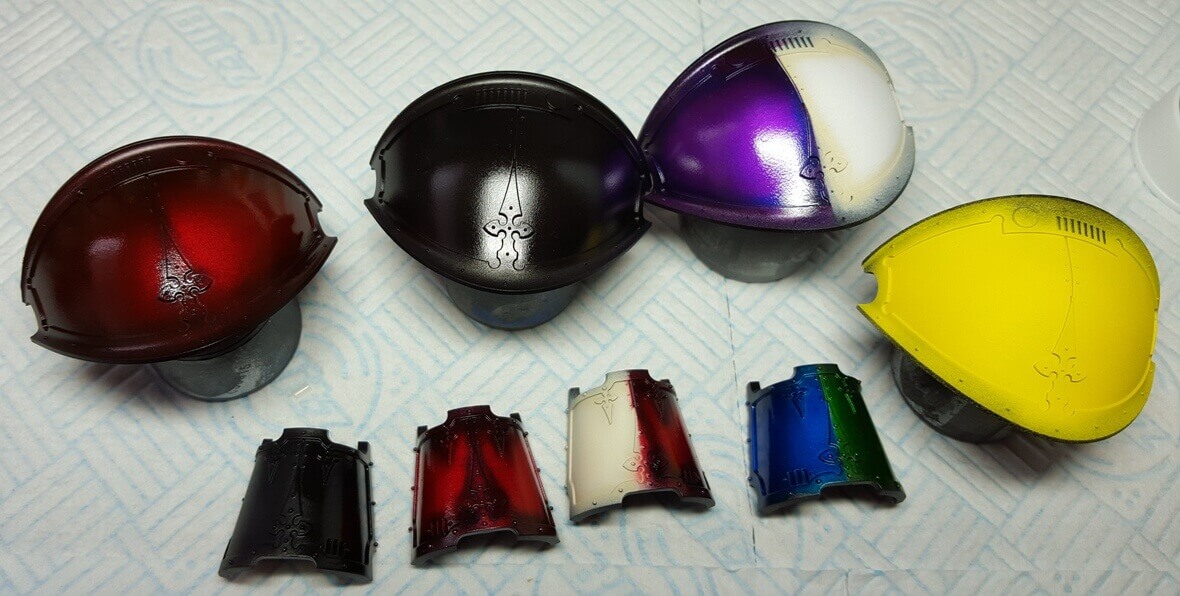
With the exception of the black, I’m really happy with all of the finishes, the yellow especially has come out really well. Most of the paints are from the new ForgeWorld airbrush range, with a odd exceptions. The basic technique for the “enamel” finish is a couple of coats of grey-metallics, a couple of Clear colours round the edge for shading and then lots of thin coats of the appropriate Clear colour. The black I tried like this, but Deathshroud (the Clear black colour) just doesn’t have the consistency that the other colours do and came out rather lack lustre. The shoulder pad above shows my attempt at mixing a stronger one using acrylic black ink and Clear Medium – it’s lovely and glossy but completely covers the colours underneath :p The best black came from a coat of Corax Black followed by shading round the edge using Vallejo Model Air Black which then received a coat of gloss varnish. The only down side with this is that the varnish can be quite thick so I need to experiment using an airbrushed varnish – although I cannot fault the finish you get from a canned varnish.
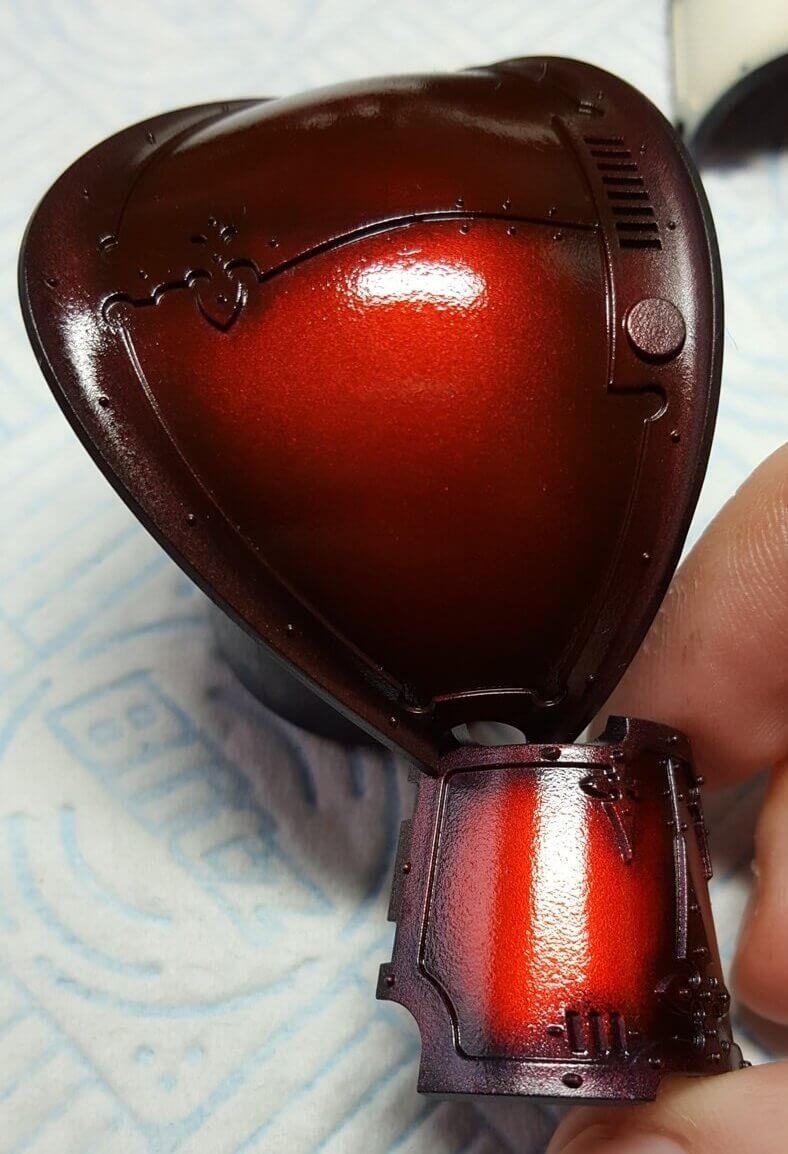 After a bit of thought I’ve decided to go for a “boringly generic” red and black scheme as this means I can use my Knights in 40k or 30k – as either Loyalist or Traitor 🙂 The technique I outlined above pretty much comes from the Horus Heresy Masterclass book (volume 1) though using Vallejo Model Air Steel as Mechanicum Alloy doesn’t yet exist as a paint. The red leg-guard shows you the candy red effect you get using the book, personally it’s a bit too bright, so I had a bash using darker metallics (Vallejo Metal Color Gunmetal with Iron Hands Steel) which produced a lovely cherry red colour which I personally prefer, especially when using black as the opposite colour.
The shoulder pad shows this cherry colour on the bottom half of the pad. The top half doesn’t have the Iron Hands Steel highlight and has very little depth in comparison.
The final bit of experimentation is what colour to paint the edge banding – and I’m really undecided. Brass always makes sense as it’s a typical Mechanicum colour, however I see it as “functional” rather than aesthetic. This is why I’ve used it as one of the colours on the skeletons, it’s also why I’ve avoided things like gold or chrome on the skeletons as the metal wouldn’t be particularly robust. I’ve tested a few colours and the other issue I’ve found was coverage, especially over the gloss varnish which is really shiny. Vallejo Metal Color does have the best adherence on this front without a doubt, but I’ve only got 4 colours and at £5.99 a bottle can’t really justify purchasing too many more but am tempted to pick up a mid-grey metallic to see what that looks like.
So with last weeks progress wrapped, up I’m onto my Week 4 Challenge:
Mask up armour plates and spray base metallics
You’ll be right in thinking that this isn’t a particularly big challenge. I’m away for all of this weekend (from Friday evening) so have only got a few evenings to get bits done and need to sort out everything that I’d normally do over the weekend. If I get a bit more time then I’ll just carry on with the armour plates.