Deprecated: Using null as an array offset is deprecated, use an empty string instead in /home/pa-syco/public_html/runebrush/wp-includes/class-wp-block-type-registry.php on line 168
Deprecated: Using null as an array offset is deprecated, use an empty string instead in /home/pa-syco/public_html/runebrush/wp-includes/class-wp-block-type-registry.php on line 168
Deprecated: Using null as an array offset is deprecated, use an empty string instead in /home/pa-syco/public_html/runebrush/wp-includes/class-wp-block-type-registry.php on line 168
Deprecated: Using null as an array offset is deprecated, use an empty string instead in /home/pa-syco/public_html/runebrush/wp-includes/class-wp-block-type-registry.php on line 168
Deprecated: Using null as an array offset is deprecated, use an empty string instead in /home/pa-syco/public_html/runebrush/wp-includes/class-wp-block.php on line 257
Deprecated: Using null as an array offset is deprecated, use an empty string instead in /home/pa-syco/public_html/runebrush/wp-includes/class-wp-block-type-registry.php on line 168
Deprecated: Using null as an array offset is deprecated, use an empty string instead in /home/pa-syco/public_html/runebrush/wp-includes/class-wp-block-type-registry.php on line 168
Deprecated: Using null as an array offset is deprecated, use an empty string instead in /home/pa-syco/public_html/runebrush/wp-includes/class-wp-block-type-registry.php on line 168
Deprecated: Using null as an array offset is deprecated, use an empty string instead in /home/pa-syco/public_html/runebrush/wp-includes/class-wp-block-type-registry.php on line 168
Deprecated: Using null as an array offset is deprecated, use an empty string instead in /home/pa-syco/public_html/runebrush/wp-includes/class-wp-block-type-registry.php on line 168
 In recent years, miniature painters have become to be more and more “sophisticated” with their painting tools and quite a few people have moved over to a wet palette as their palette of choice for painting.
I’m pretty positive that the vast majority of people reading this will know what a wet palette is and how it works, so please forgive me for going over old ground. For those of you who have never encountered one, a wet palette is quite simply a device that holds a reservoir of water underneath a special paper layer where you put your paints on. This has the effect of keeping your paints cool and moist, which extends the time before they dry out. As you can imagine this has a huge benefit when painting something that requires a lot of blending or the paint to be kept at a specific viscosity for the duration of a painting session. Another side benefit is that if the container has an air tight lid, you can close the palette up and come back to it in a couple of days time and (depending upon paint separation) can just get straight back painting.
A wet palette is actually a very simple construction. A container of some kind has some form of absorbent layer (sponge, paper etc) which is saturated with water. On top of this a piece of silicon or greaseproof type paper is placed. The silicon paper will absorb some of the water, but won’t disintegrate. There are a few commercially available wet palettes, but many painters make their own (Massive Voodoo have a tutorial here).
There are mixed opinions as to if a wet palette is worth the hassle, personally I find one invaluable when painting something that I’m trying to layer or blend, flesh being of particular note. Base colours and normal metallics I still tend to use a normal palette for. Quite a few painters who do display pieces use a wet palette in a way where they mix up a large quantity of base colour in the centre and then draw little pools off and mix colours for shadows, nuances and special effects. Regardless, the palette keeps them all wet so you can easily go back and forwards to get the piece just right (though it’s also easy to overdo this and faff).
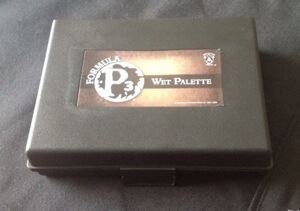
For gaming standard you have the benefit that you can mix up two highlight colours at once and just carry on painting the whole of a squad without fear that either one will dry up. I’ve tried various wet palettes, from making my own to a couple of commercial ones. The biggest difference between the ones I’ve bought and made had been that I’ve never been able to source a container the right size, takeaway containers are too deep (so you have to reach into the container). And commercial (artists) ones are normally massive (generally larger than A4), which make them unwieldy for the way I paint. However I noticed a while ago that Privateer Press have now released one specifically for the miniature industry. I’ve had this on a wish list for a while, but got given one for my Birthday and have been using it for a couple of months now.
The Review
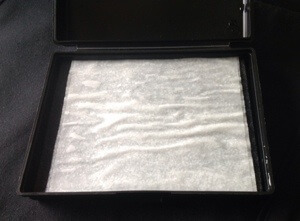
The first thing you notice is that it’s very compact black box, smaller than A5 in size. Opening it up you discover a pack of tear off palette sheets and a black sponge – identical to the blister sponge you find in some miniatures. Instructions come on a separate sheet and basically consist of a “insert sponge, pour water, insert sheet, flip over sheet, wipe down”. Pretty simple and you could have worked it out yourself 😉
The first comment I would make is that the sponge initially isn’t very absorbent. I’d recommend that you wash it in a bowl of warm water and a tiny bit of dish-washing soap, just to help it retain the water. The biggest problem with a sponge is that water will naturally “sink” to the bottom, which actually draws the moisture away from your palette paper. This is actually the opposite of what a wet palette should do as working with the palette for more than a few hours will result in the edges of the paper starting to dry out and curling at the corners. You can top the sponge up, but this actually involves filling the container up to the top of the sponge and then pouring the free flowing water away – either that you you have to keep the palette flat and leave it “full” – not very useful if you’re not painting on a perfectly level desk.

The palette paper has been cut so that it fits into the container, leaving around a 8mm gap at the two short edges, but snug on the long edges. This doesn’t quite work however as the paper expands when wet so you end up with it being too wide and have to fold it up by 1mm on one of the long edges. I also felt that the palette paper didn’t wick water up in the same way as other palette papers. Some papers seem to pull through the paper so you can thin the paint by just drawing along the paper, not so on this – although I am prepared to admit that this may have been because of the sponge or that I might need to soak the paper rather than just wetting it. The paper can be led super flat as well, although it is a mixed blessing as the “folds” you get in the paper can stop paint from flowing everywhere.
Finally the box isn’t airtight. I really don’t understand why Privateer Press didn’t implement some kind of seal round the edge of the box, every purchasable palette I’ve seen has an air tight seal of some kind. This means that you can’t sensibly leave the palette for much longer than overnight if you expect your paints to be usable.
Although I’ve done the negatives first, there are some positive gems in this product. The size of the box is perfect for miniature painting. It’s small enough to fit comfortably on a painting tray or the arm of a sofa, the lip of the container is shallow enough to not require extra effort with your brush and you can rest paints and brushes in the open lid, making it even more space efficient. The lid is attached too so you don’t end up having to find a home for it (i.e. the floor). One other point I would make is that the box is a solid upvc box, not a vacuum formed blister.
The sponge is a perfect fit, so nothing shifts round in the container if you tilt it. This is a real pain with home made palettes where things never seem to quite fit right. Finally you get a decent amount of palette paper in the tear off pad, which does encourage you to change sheets fairly regularly.
Summary
I’m very mixed in my opinion with the P3 wet palette. On the one hand the size is absolutely perfect for what I use which is the reason I wanted one. However, “out of the box” it doesn’t really work very well as a wet palette, especially in comparison to others. The combination of the container not being air tight and the sponge not being particularly absorbent means that you actually loose one of the biggest benefits of wet palettes – allowing you to pause a painting project over a number of days and come back as if you’d never left.
Price wise you’re looking around £11 plus postage and around £6 for two pads of papers. Artist wet palettes come in around the £15 mark, however they’re going to be 3 ~ 4 times larger, plus air tight. Looking at it objectively, the P3 wet palette is expensive and doesn’t fulfil all of the roles you would expect from a wet palette. On paper an artist wet palette is a more economical purchase. However most artist wet palettes are made from flimsy vacuum formed plastic which means dropping it or any kind of damage will likely make it unusable. The solid upvc box of the P3 wet palette not only makes you feel like you’ve a “real” product in your hands, but will also withstand quite a bit of punishment.
Personally, if you have a dedicated painting desk, go for a full sized artist wet palette. You’re unlikely to damage the container and can make the most of a large palette area. If like me you occasionally paint sat in front of the telly or are perhaps more limited with desk space, the P3 wet palette is an ideal starting point, plus if you follow the first tip below, you can alleviate most of the problem with the palette drying out quickly.
As a final point, I know it’s possible to make a perfectly acceptable wet palette using things round the home, somehow I’ve never got on with them. There has always been some niggling issue that has annoyed me and I’ve never really found a container that both works to get paint out of and doesn’t look bloody daft (the whole “why have you got paint in a lunch box” conversation). The other argument of “but you can buy a roll of silicon/baking paper for less than a pad of palette paper” is also very true and you get significantly more of it, I however don’t really want to spend an evening cutting up squares of paper – I’d rather be painting than faffing with scissors… Spending under £20 will get you a good professional looking solution regardless of your requirements.
Tips & Modifications
Trim a couple of sheets of kitchen towel to fit in the container and place them on top of the sponge before you put the paper in place. This will maintain a level of moisture in contact with the paper which should almost remove the chance that it will dry up (unless you store it on a radiator). Also should any paint flow off the palette paper, it will be absorbed by the kitchen towel and not the sponge. You’ll also be able to see when you need to top up the water as the kitchen towel will begin to try before the palette paper. Blotting paper will also work instead of kitchen towel.
Use distilled water (or if you have access to it, reverse osmosis water) to fill up the palette. This tends to have less crap in it than tap water so should mean that your sponge shouldn’t go manky too quickly. Don’t use mineral water. If at any point you start to notice an odour you should immediately clean your sponge in clean water with a tiny drop of bleach to kill off any bacteria. Let it dry and go through the same process you did when you set it up originally.
If you’re desperate to keep your palette fresh for a long period of time, pop the whole box into a zip lock food bag and seal it up (removing as much air as you can). This should seal the moisture in. You can also pop it into the fridge but I don’t see much benefit from doing that and you could change the paint if it’s too cold.