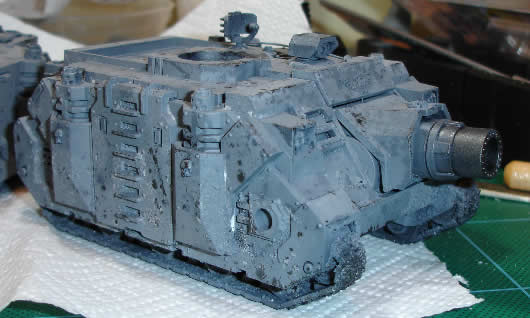
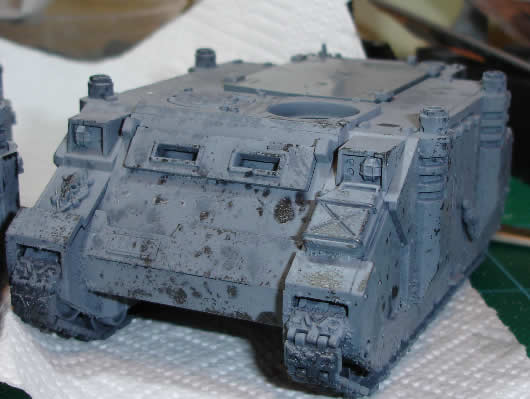
Here are the pics of the tanks that I airbrushed the other day.


As I said in a post yesterday, I’m fairly happy with the end effect, although it’s not as subtle as I’d have hoped.
As I still had the garage available, I took the opportunity to do some more airbrushing. I didn’t get on nearly as well as I did on Sunday, I managed to thin one paint down too much and at the end of the session realised that I had a obstruction at the bottom of the cup underneath the needle… Oh well, I’ve learned the hard way and won’t make that mistake again. I also need to keep my work area a bit clearer if possible. I found that I had cans of spray and things in my way.
I did manage to refine my salt technique a little however and have more ideas for further improvement. I applied less salt on the first layer and tried to use smaller pieces. The second salt layer got applied via a salt grinder – in fact one that often sits on the dining table. Instead of running a cold tap and scrubbing with a toothbrush, I used the back edge of a knife to ‘ping’ the salt crystals off. Once I’d got most of them off, I gently went over with a toothbrush that I dipped into a pot of clean water – not much mind you, just enough to dissolve some of the salt. Once dry I repeated the process with the knife and toothbrush. One thing I have discovered is that small salt crystals applied on the first layer are extremely difficult to remove, as they are protected by two layers of paint and a layer of hair spray which results in an uneven bumpy texture.
One thing that I will be doing in future is to apply less hair spray as the binding agent. Probably just holding the can further back will be enough, but I found as I was removing salt with the knife, that every now and again I came across a rubbery bit that had caught around the edge of the salt. This peeled away OK, but did cause extra work and could expose too much of the base colour. I will also be using even less salt for the first layer and will filter out the smaller crystals (which are difficult to remove).
In order to finish the bulk of the tank I need to do a couple of things. Firstly I need to shade the tank. Initially I’ll deepen the shadows with thinned Adeptus Battlegrey. Then I’ll apply washes of blue, purple and brown into the recesses. The brown will also be applied more heavily the close to the tracks I get. I then need to highlight the whole tank with Fortress Grey. I’m currently torn between dry-brushing and actually painting the highlights as I would a marine. Fundamentally I only need edge highlights as the actual armour will be done. Then it’s tracks, mud and finally details. Once I’ve done these two I reckon that I could get an average tank done over a two day period, giving it enough time to dry as well. This is good as I have a mate who I’m helping to get his guard army painted and currently has around 12 tanks and 2 baneblades…